¶ Homescreen
The home page following login, consists of three main buttons, three main tabs and a search facility.
Three main buttons:
Customer Enquiry –The customer enquiry button will always bring you back to the home page.
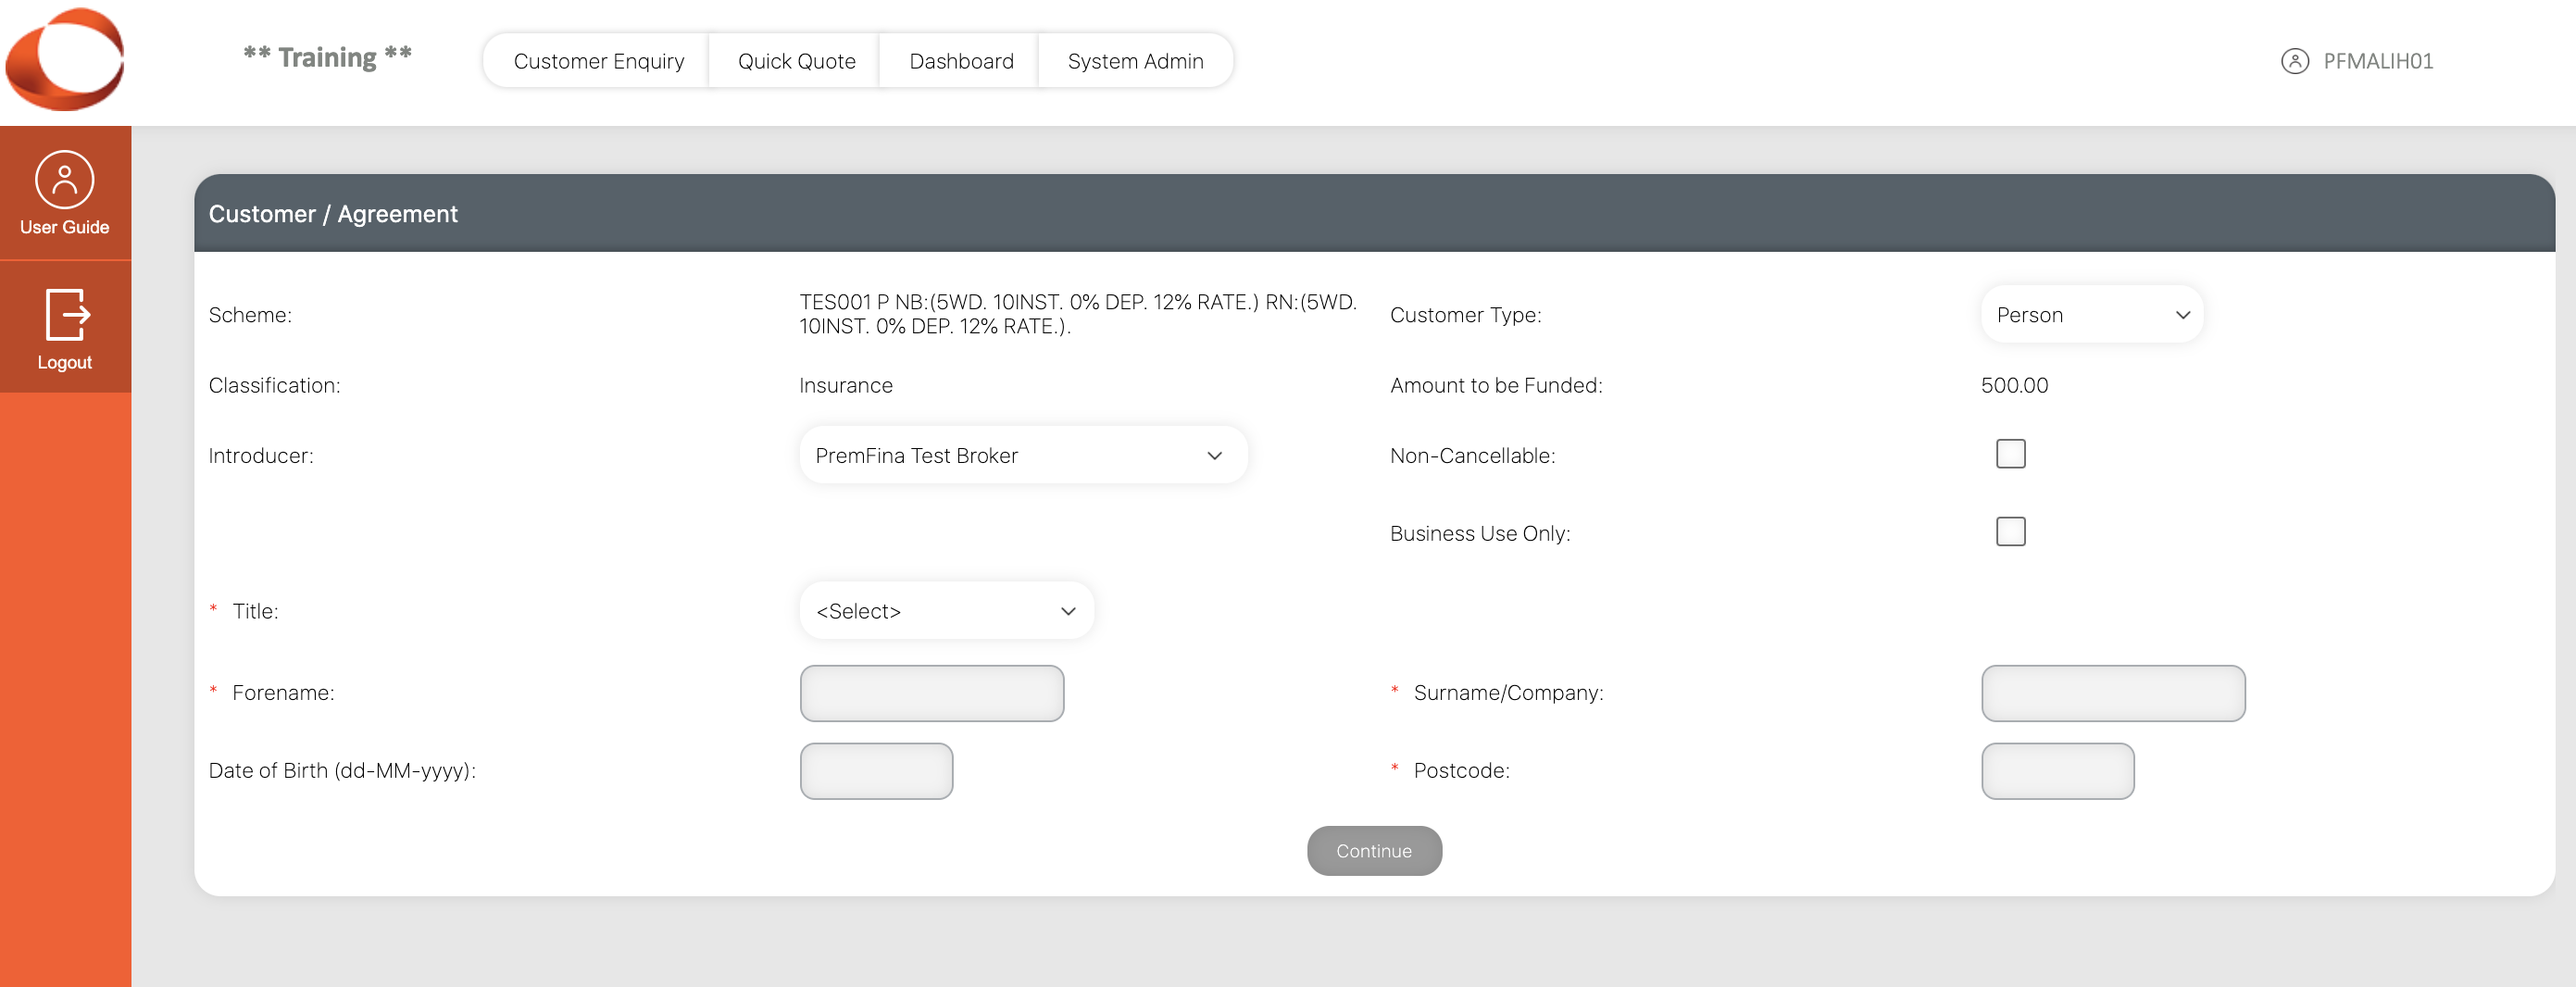
Quick Quote -The quick quote button will take you to the page where you will be able to get a quotation for monthly direct debit instalments, input customer details and activate the credit agreement.
Change Password/System Admin Depending on User Level either the Change Password or System Admin button will appear. Both will allow you to change your password,Users with System Admin access will also enable you to download information and export the information to a spreadsheet.
Three main tabs (these form the Servicing Queue)
- Agreements Queued to Servicing – This tab will enable you to see all agreements that have been queued to service e.g.: All defaults, mandate issues and refunds etc.
- Queued Proposals – This tab will enable you to see all agreements that have been given an agreement number, but not yet been activated.
- Agreements Queued to Arrears Management – This tab will enable you to see all agreements that have been through the default process, and are queued for cancellation.
¶ Loading New Business
The loading of new business covers the whole process of initial quote, data capture, production of the credit agreement, setting up the direct debit instruction, and ‘activating’ the agreement.
At any point up to ‘Activation’ it is possible to click on the title of a previous panel to return to it and amend the details.
It is also possible to leave new business processing and go back to it later without losing the saved detail, as long as the agreement has been created i.e. once the customer details have been saved.
¶ Quick Qoute Process
The quick quote facility is used to start the agreement creation process, and certain details will be automatically defaulted into the page.
Depending on your User Level, it can also be used to provide a customised quote by overriding the default values.This is usually only required for bespoke or commercial policies.
Select the Quick Quote button from the top of the page.

The scheme defined as the default will be displayed in the Scheme field. This can be replaced with another scheme available to you. To find an alternative scheme, delete the default scheme, replace with your broker code and click enter this will bring up a list of all of your scheme codes, along with a description.
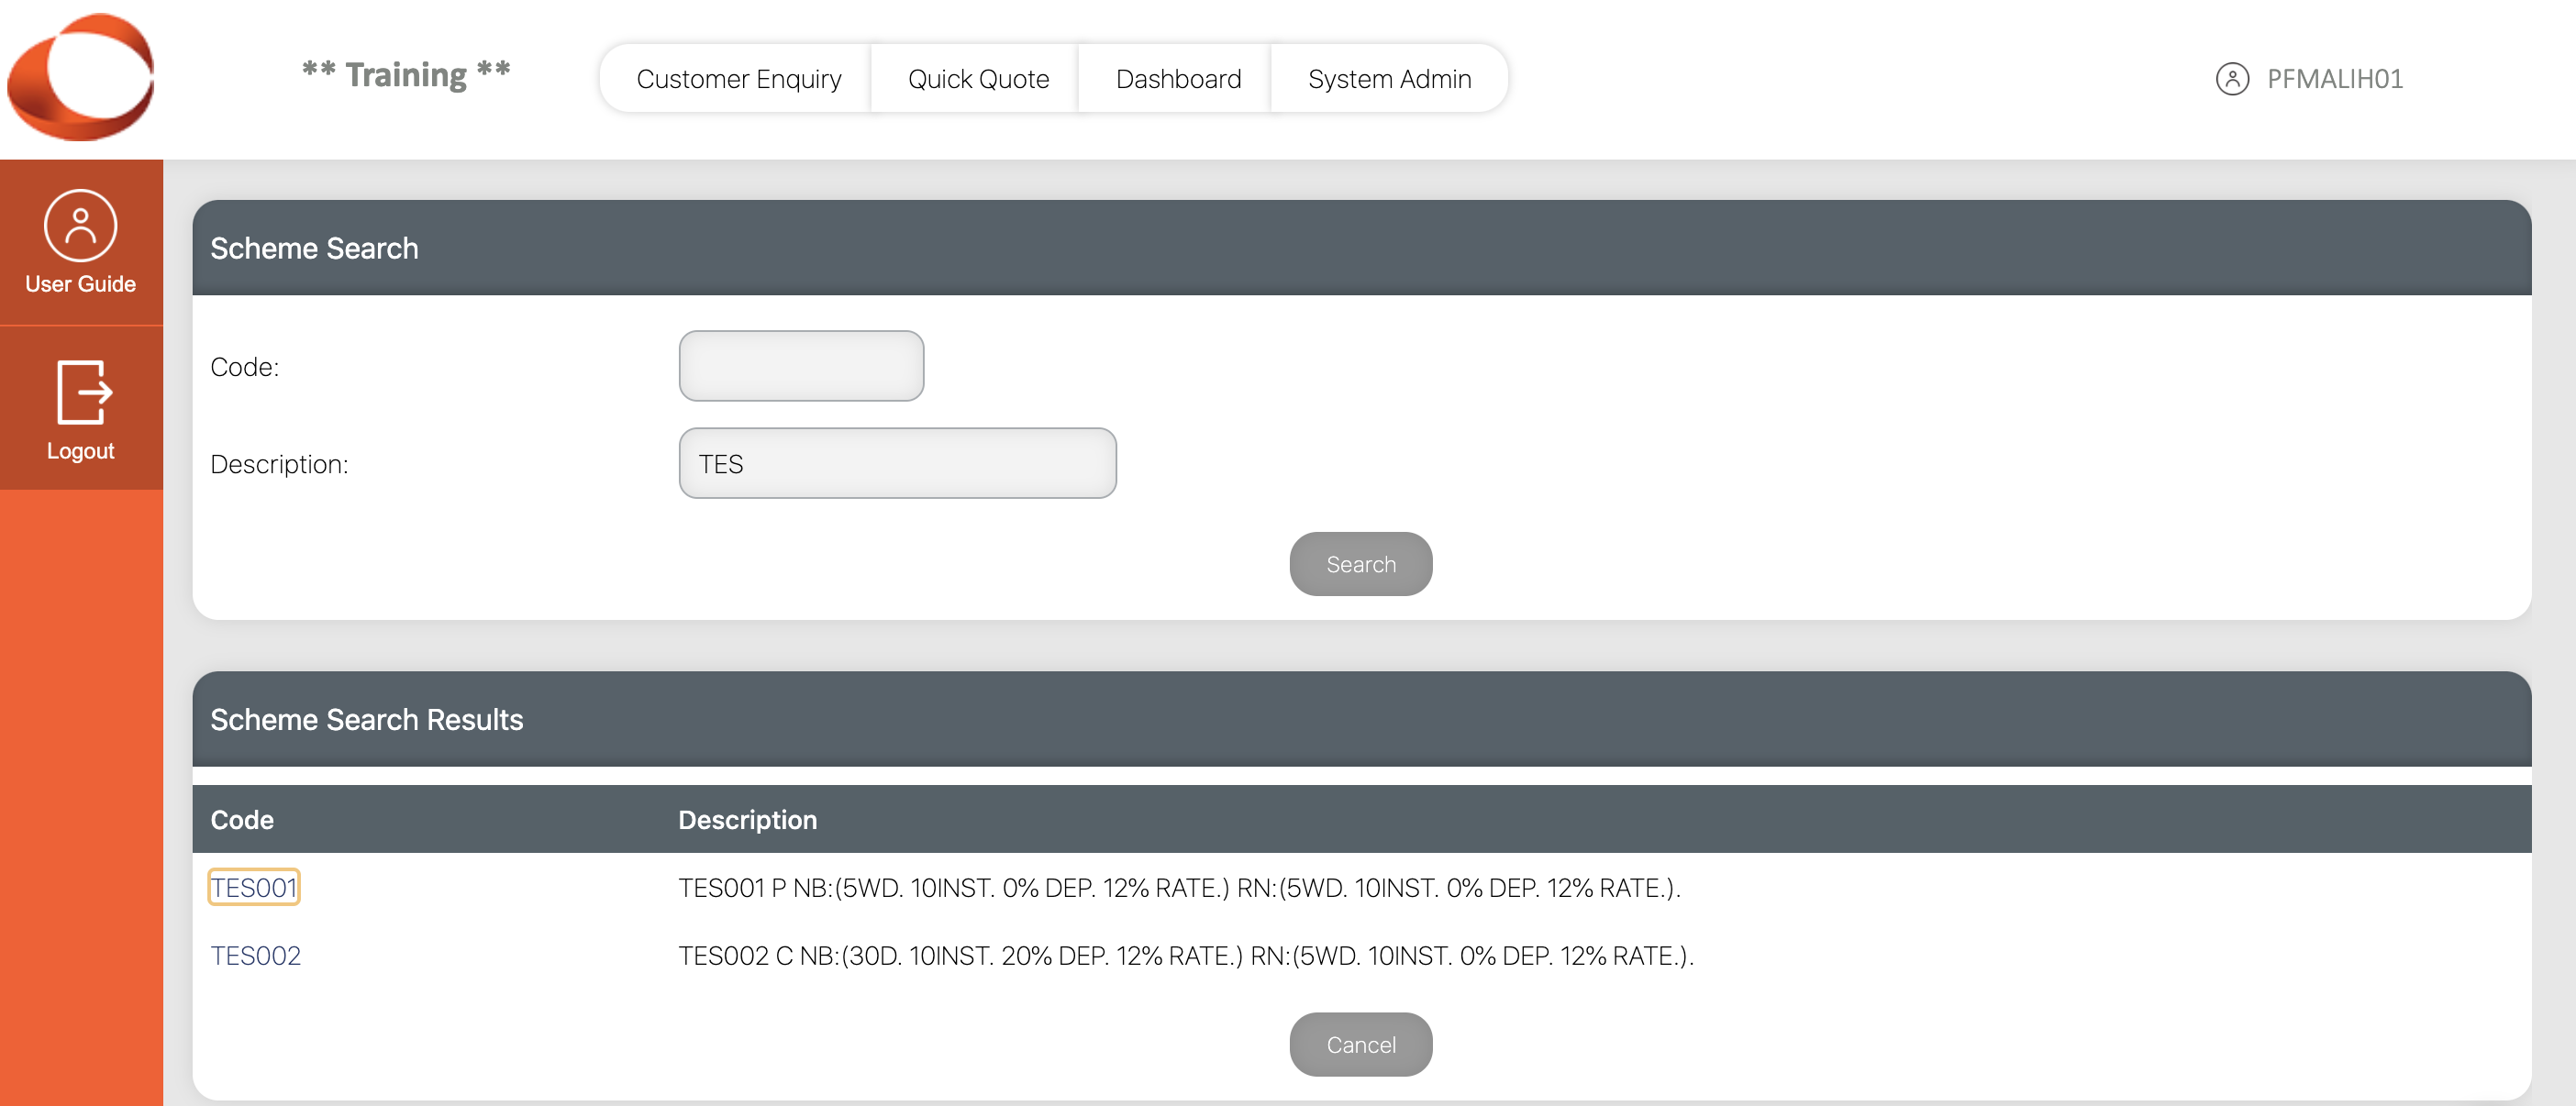
Clicking on the required scheme code takes you back to the Quick Quote page, where you can now enter the premium amount and click Quote.
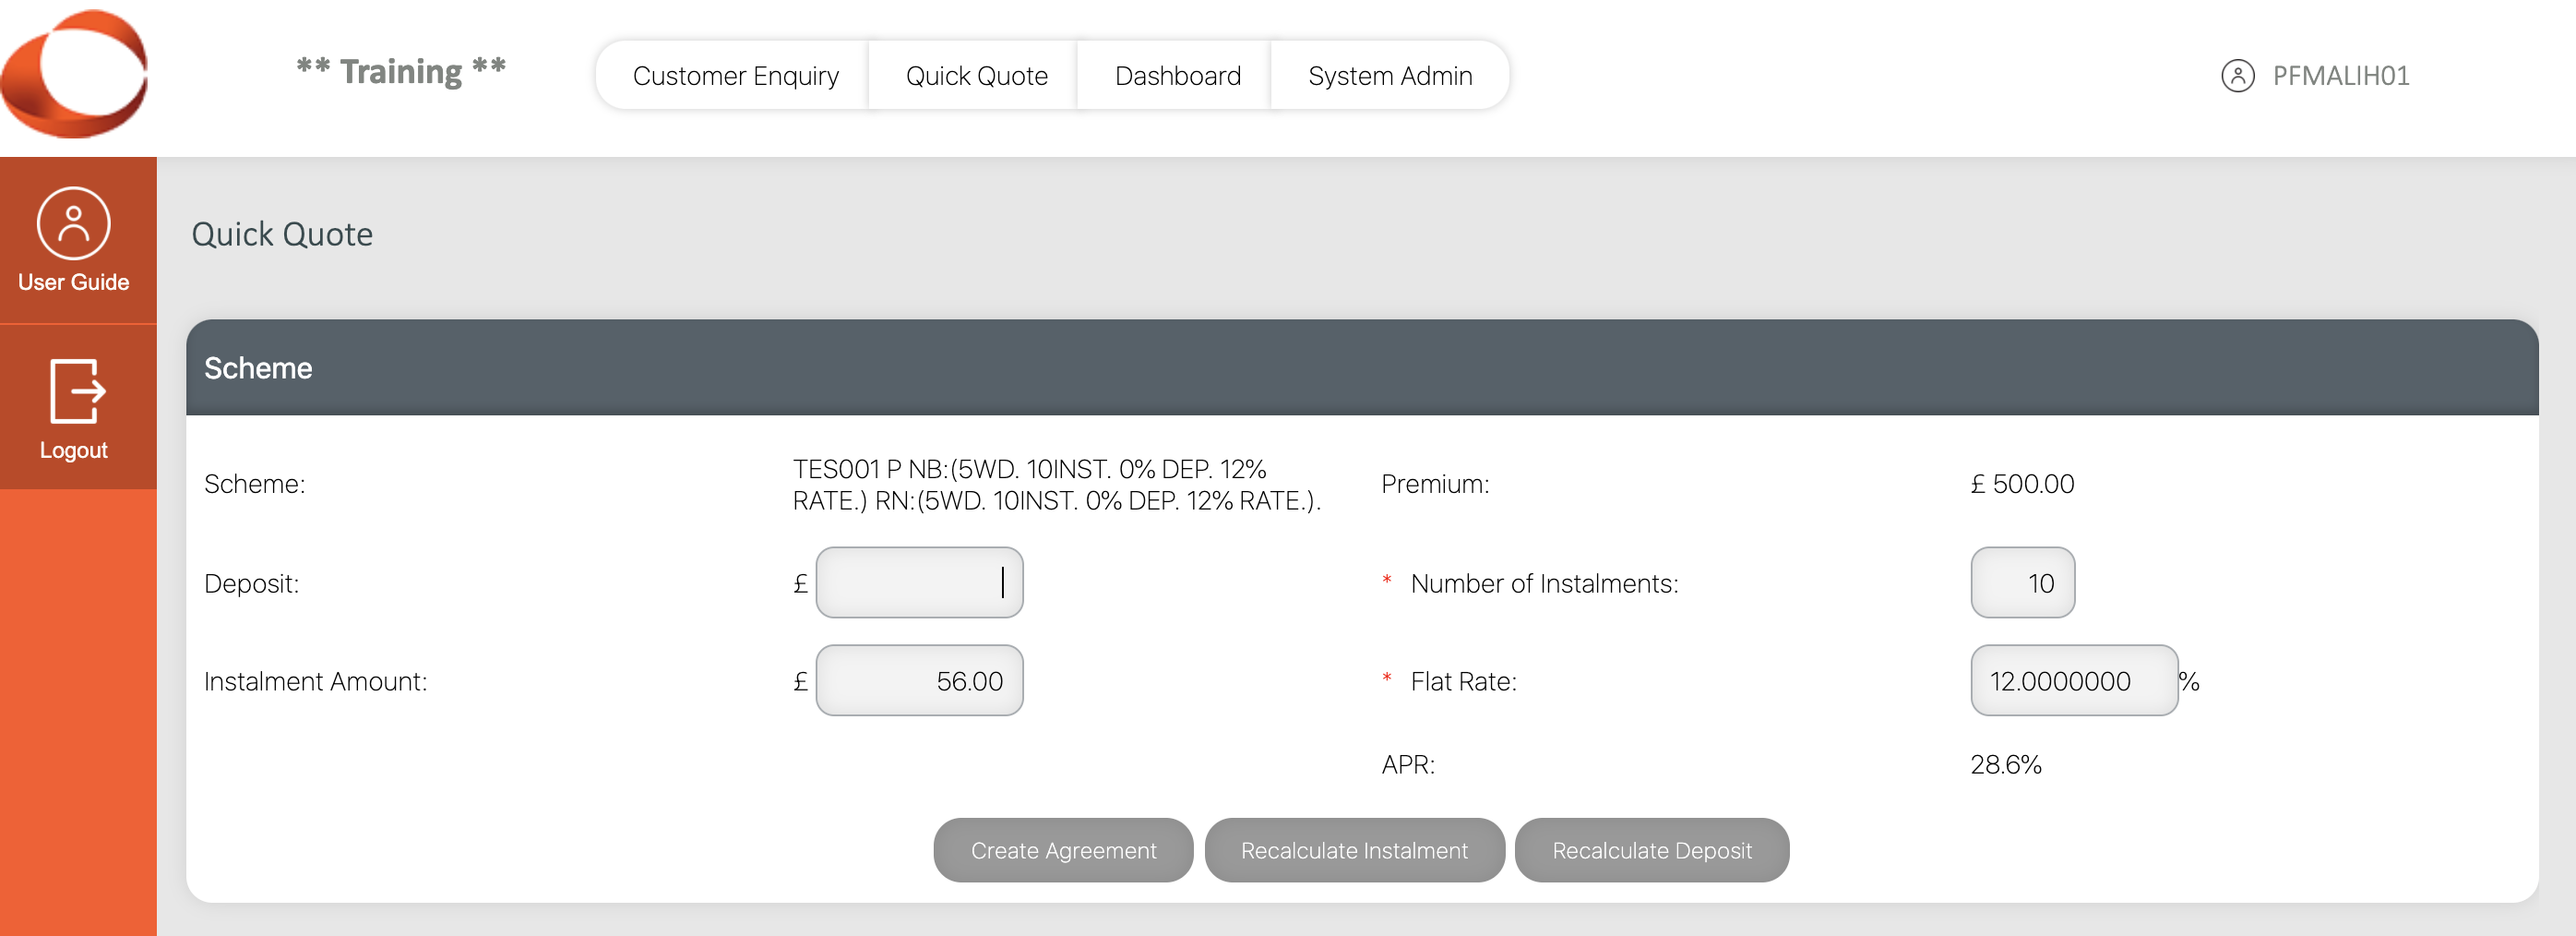
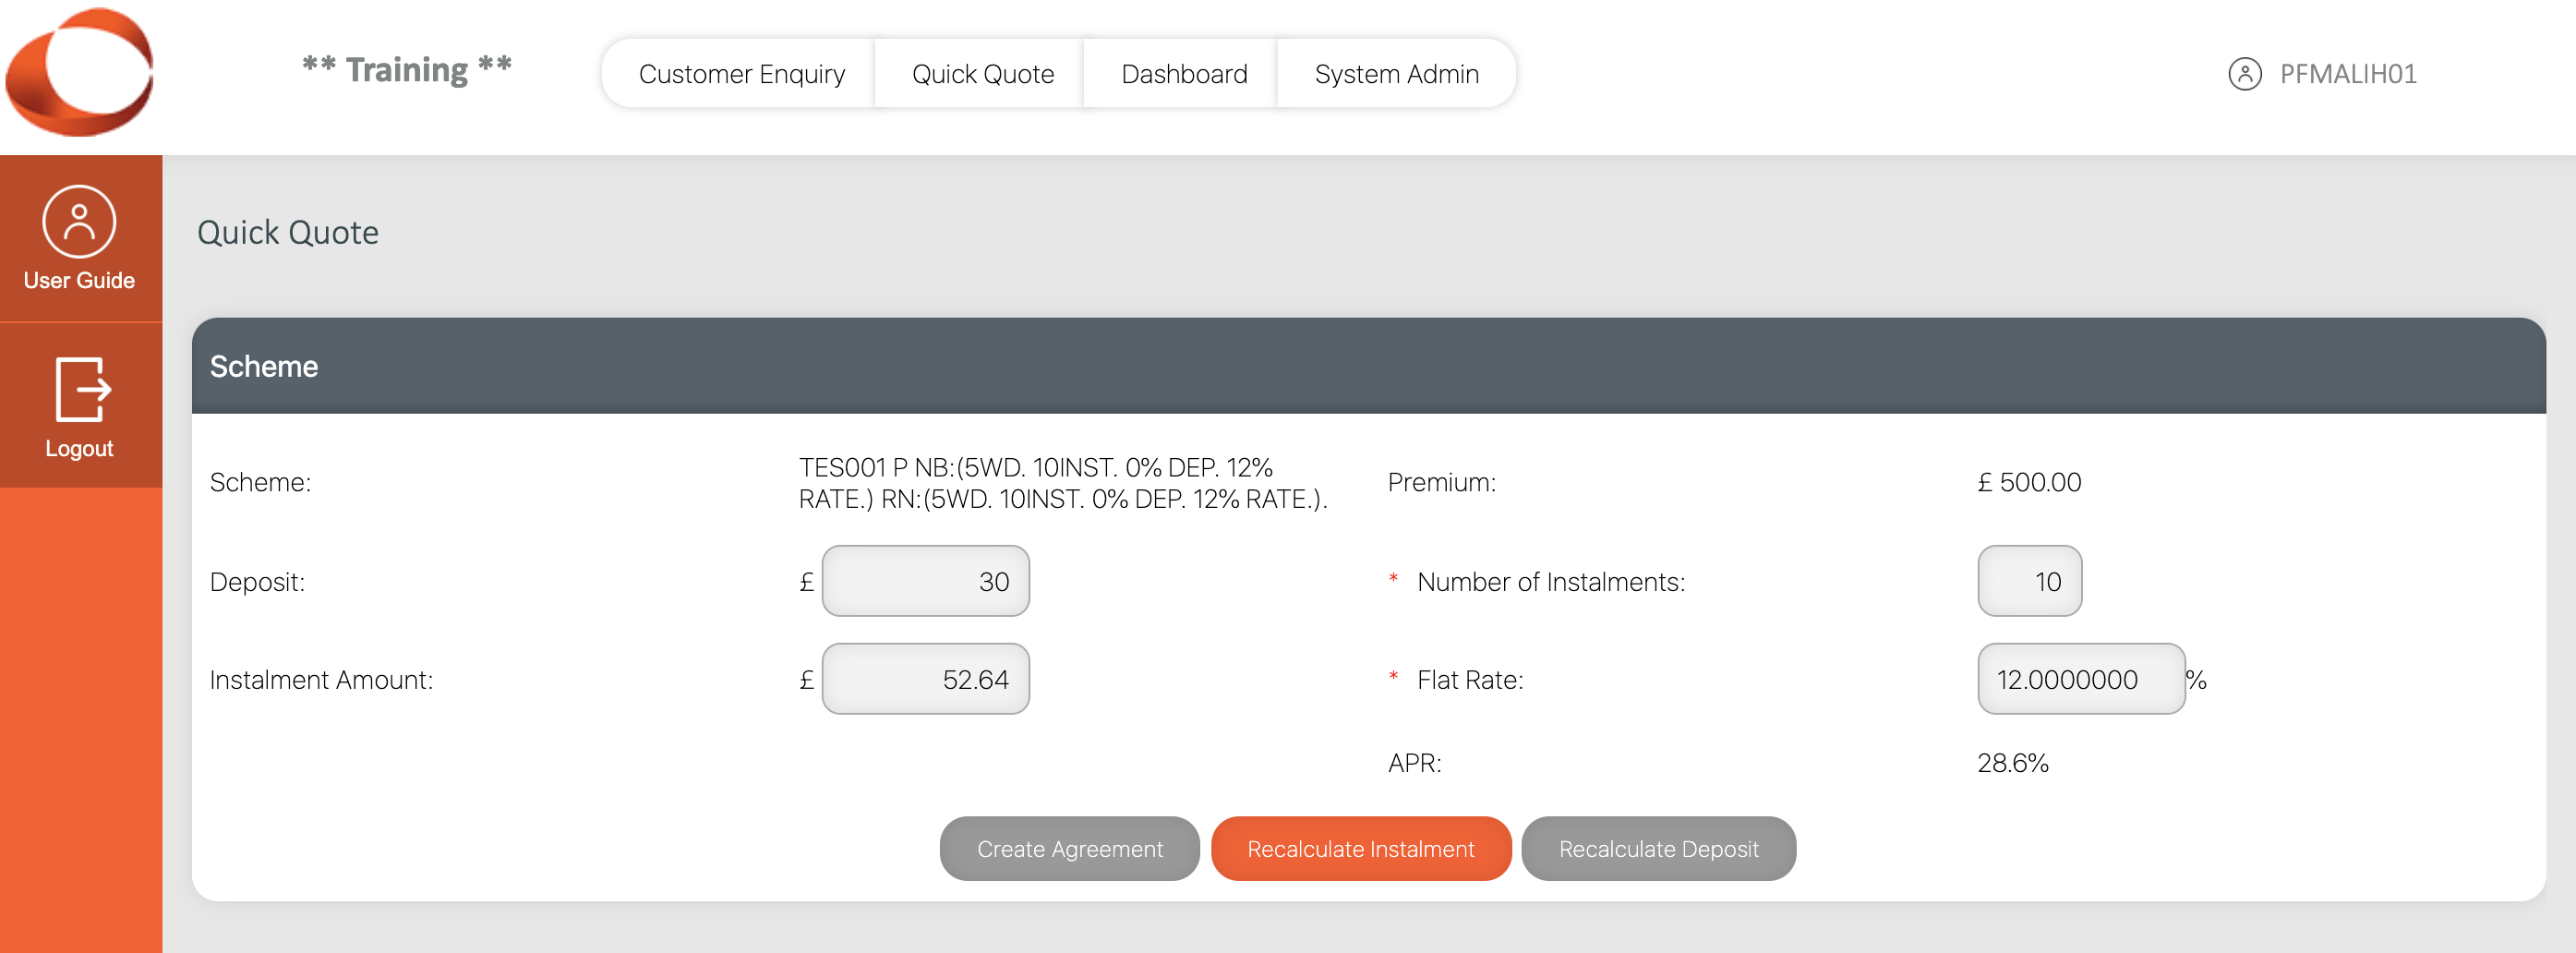
- Fields will be populated based on the scheme parameters, now complete any unpopulated fields.
- Depending on the User Level, the only fields that can be overridden are deposit and instalment amount. If these fields are changed, click the relevant recalculate button.
Click Create Agreement when the figures displayed match the figures required. This will progress the agreement to the next stage.
- The default Customer Type is taken from the chosen Scheme, but an alternative can be chosen from the drop down list.
- The Introducer field displays your broker name. If your business has multiple brokers, then an alternative introducer can be chosen from a drop down list.
- The Non-Cancellable flag is linked to the Scheme, but can also be amended.PremFina allow very few non-cancellable agreements.
- The Business Use Only flag is set by you on a case by case basis, and has an impact on whether the agreement is covered by the Consumer Credit Act 1974. Make sure you understand the difference between personal and commercial only insurance.
Person
- The Title, Forenames, Surname and Postcode fields must be entered for customer type ‘Person’.
- The Date of Birth must be entered as this will help to identify if the person is an existing customer.
Company
- The Company and Postcode fields must be entered for the customer type of ‘Company’. Once the appropriate details have been entered, click Continue.
¶ Customer Address
If the person is an existing customer, the following page will display the customer search results.
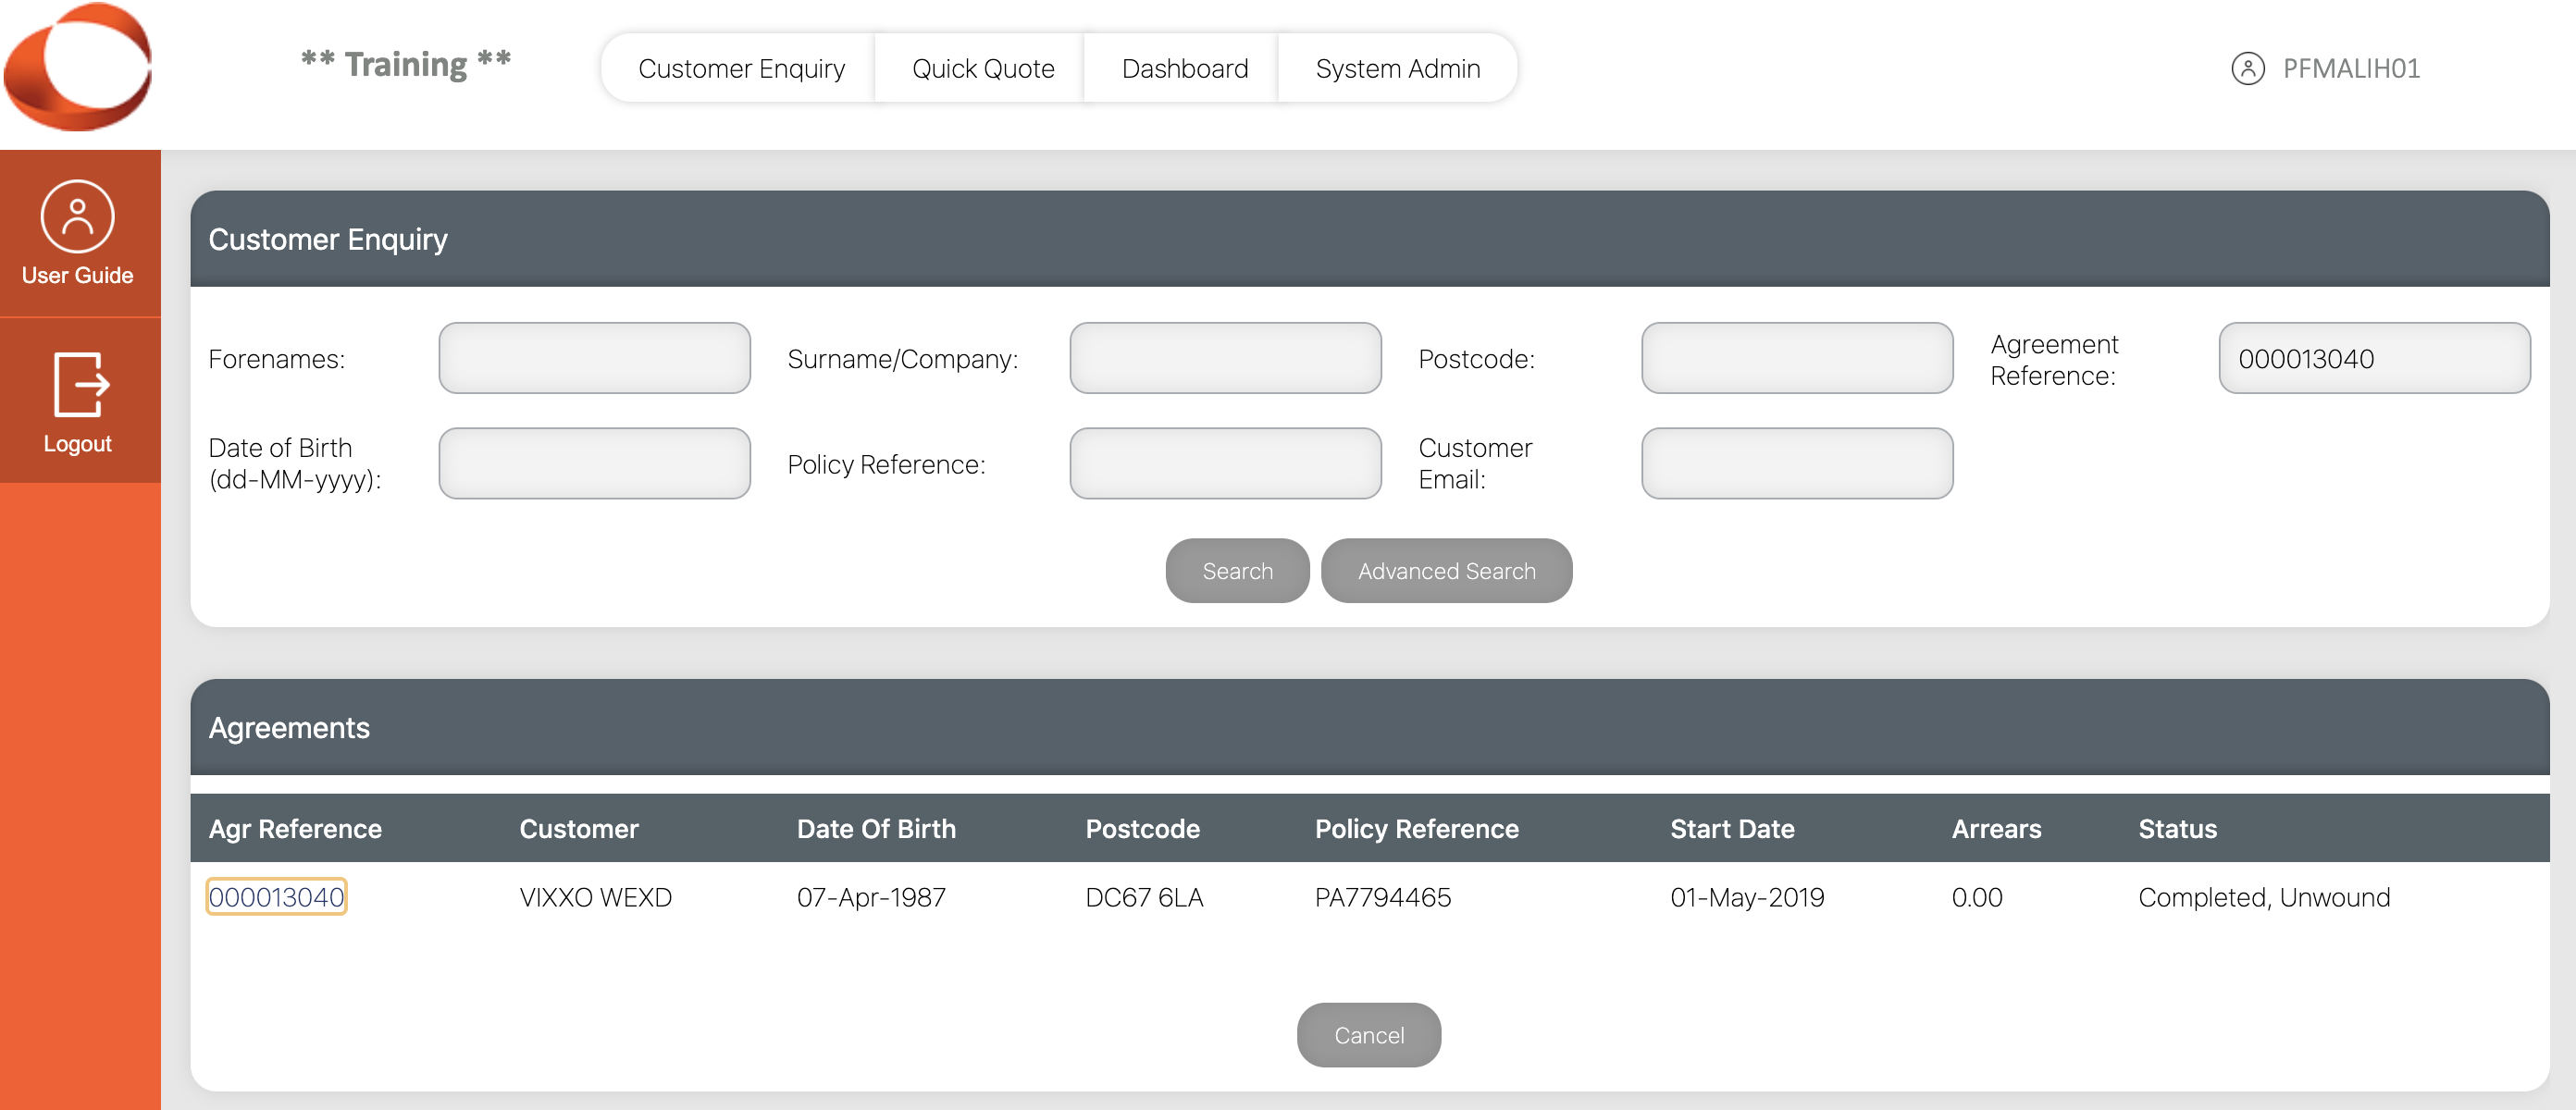
Click on the Customer name, only if the listed customer is the customer taking on the agreement.
Where an existing customer is chosen, the address will be defaulted in from the existing record. If the customer has changed address, it must be changed by clicking on the New Address button, not by amending the Customer screen. This will create a new record to preserve an audit trail of all addresses entered for a customer. The only exception is in the case of a spelling or similar mistake.
If a listed customer does not match your customer, click New Customer. For a new customer the address will have to be typed in.
Please note an agreement number has now been generated. Click on the agreement number if you need to go back to the previous screen.
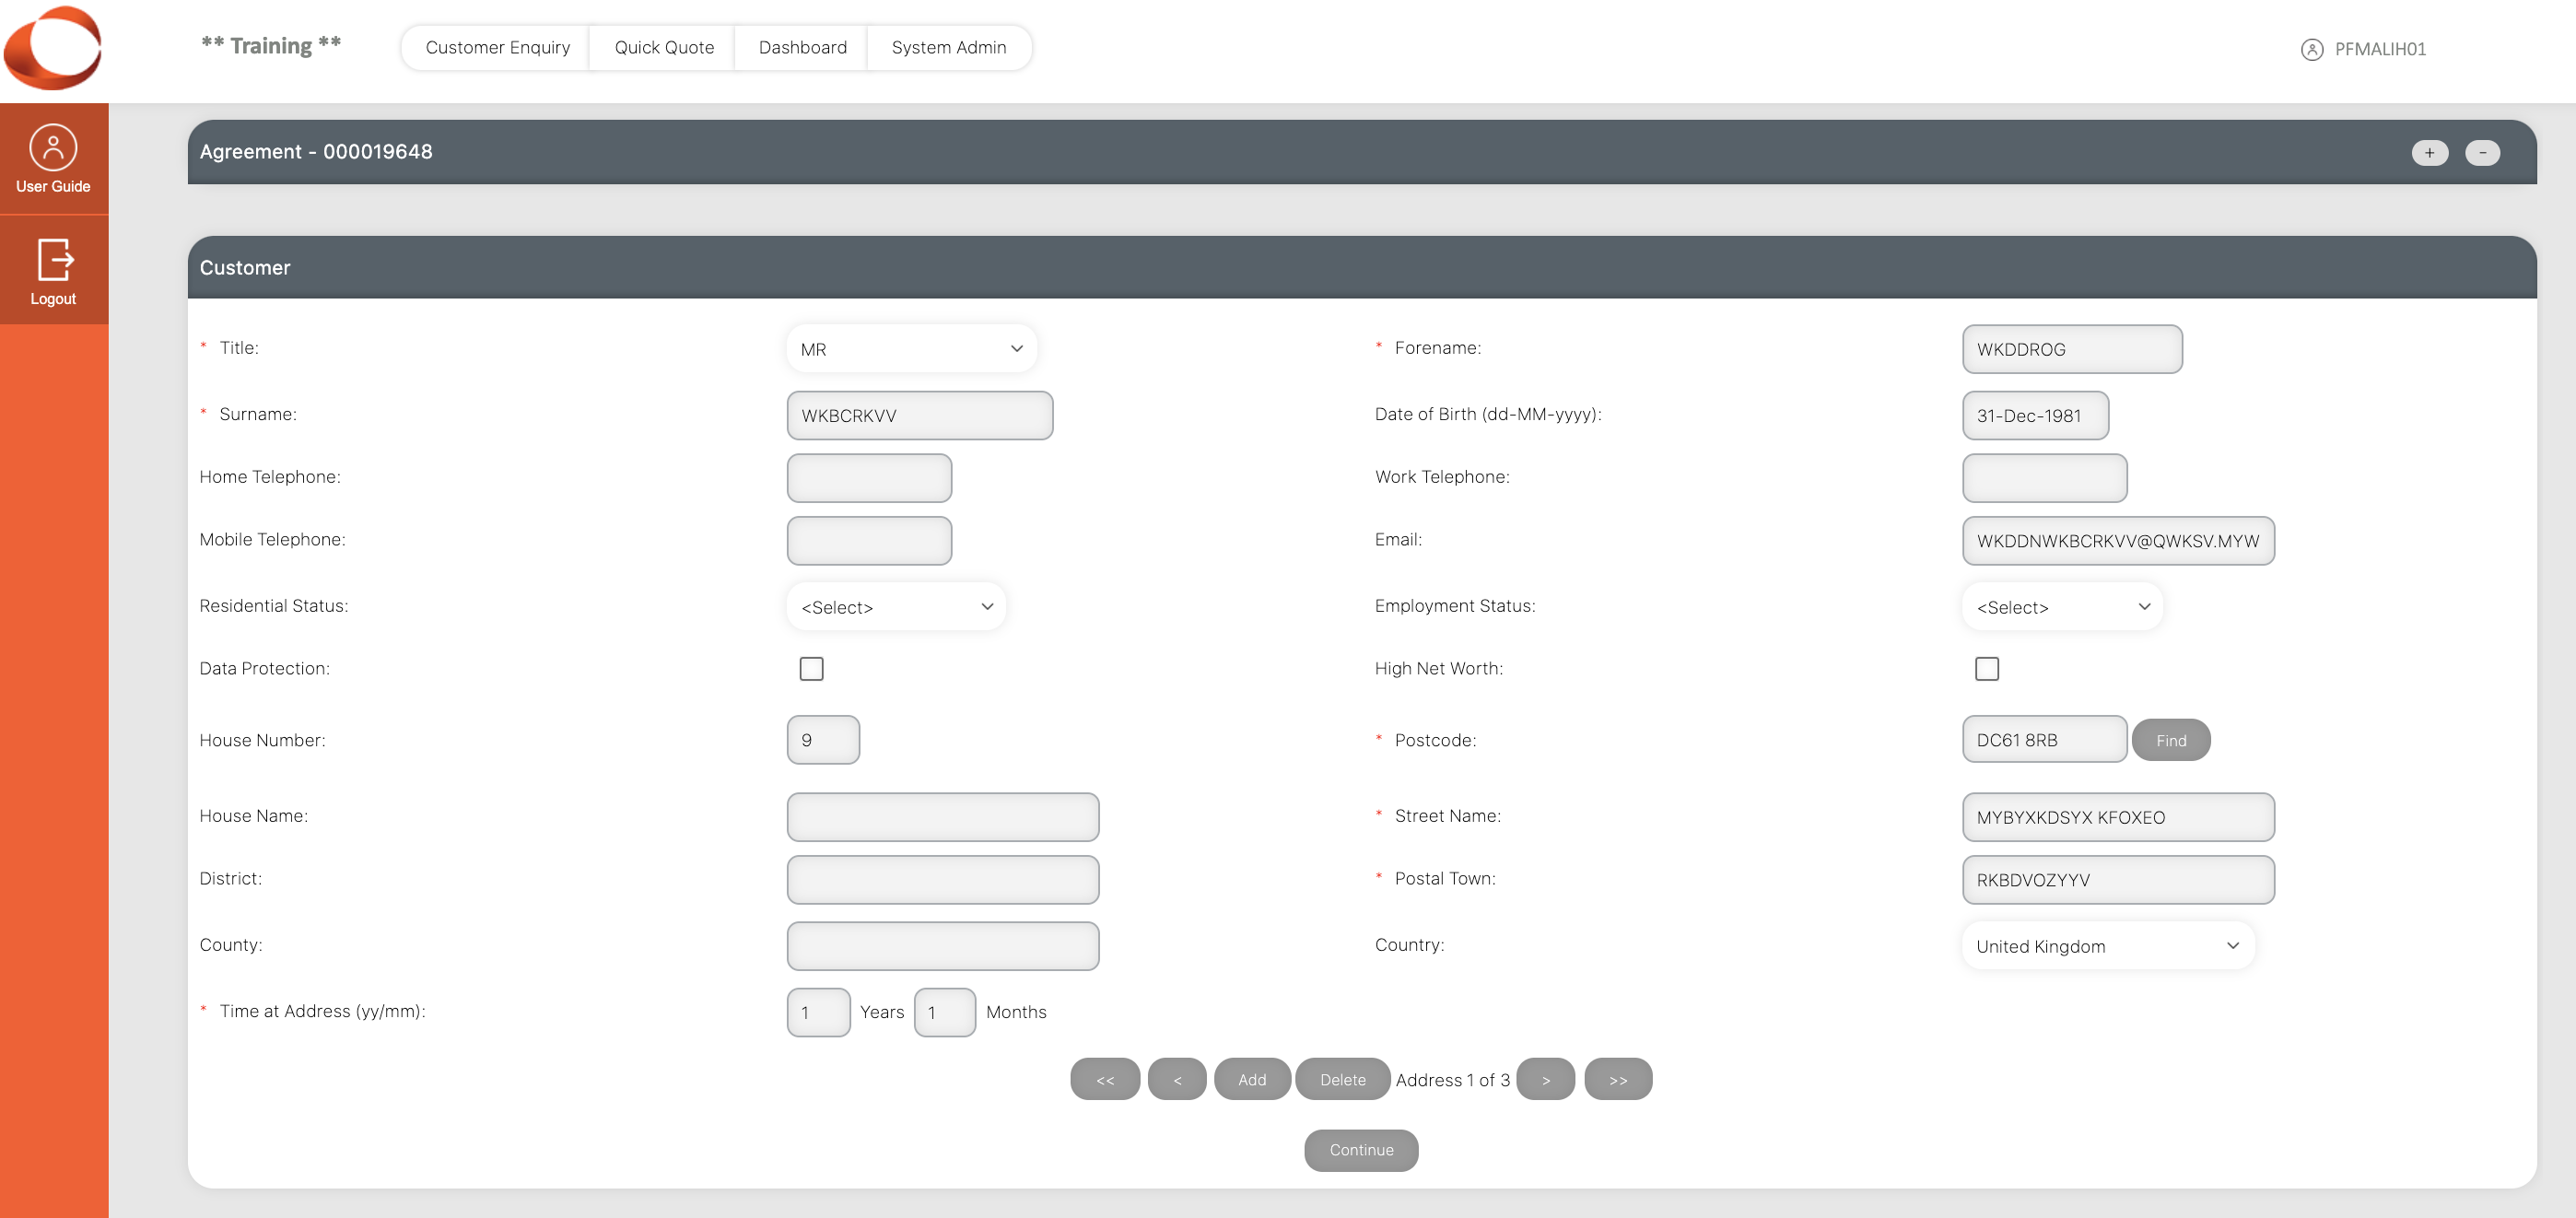
When the necessary address details have all been input, click Continue.
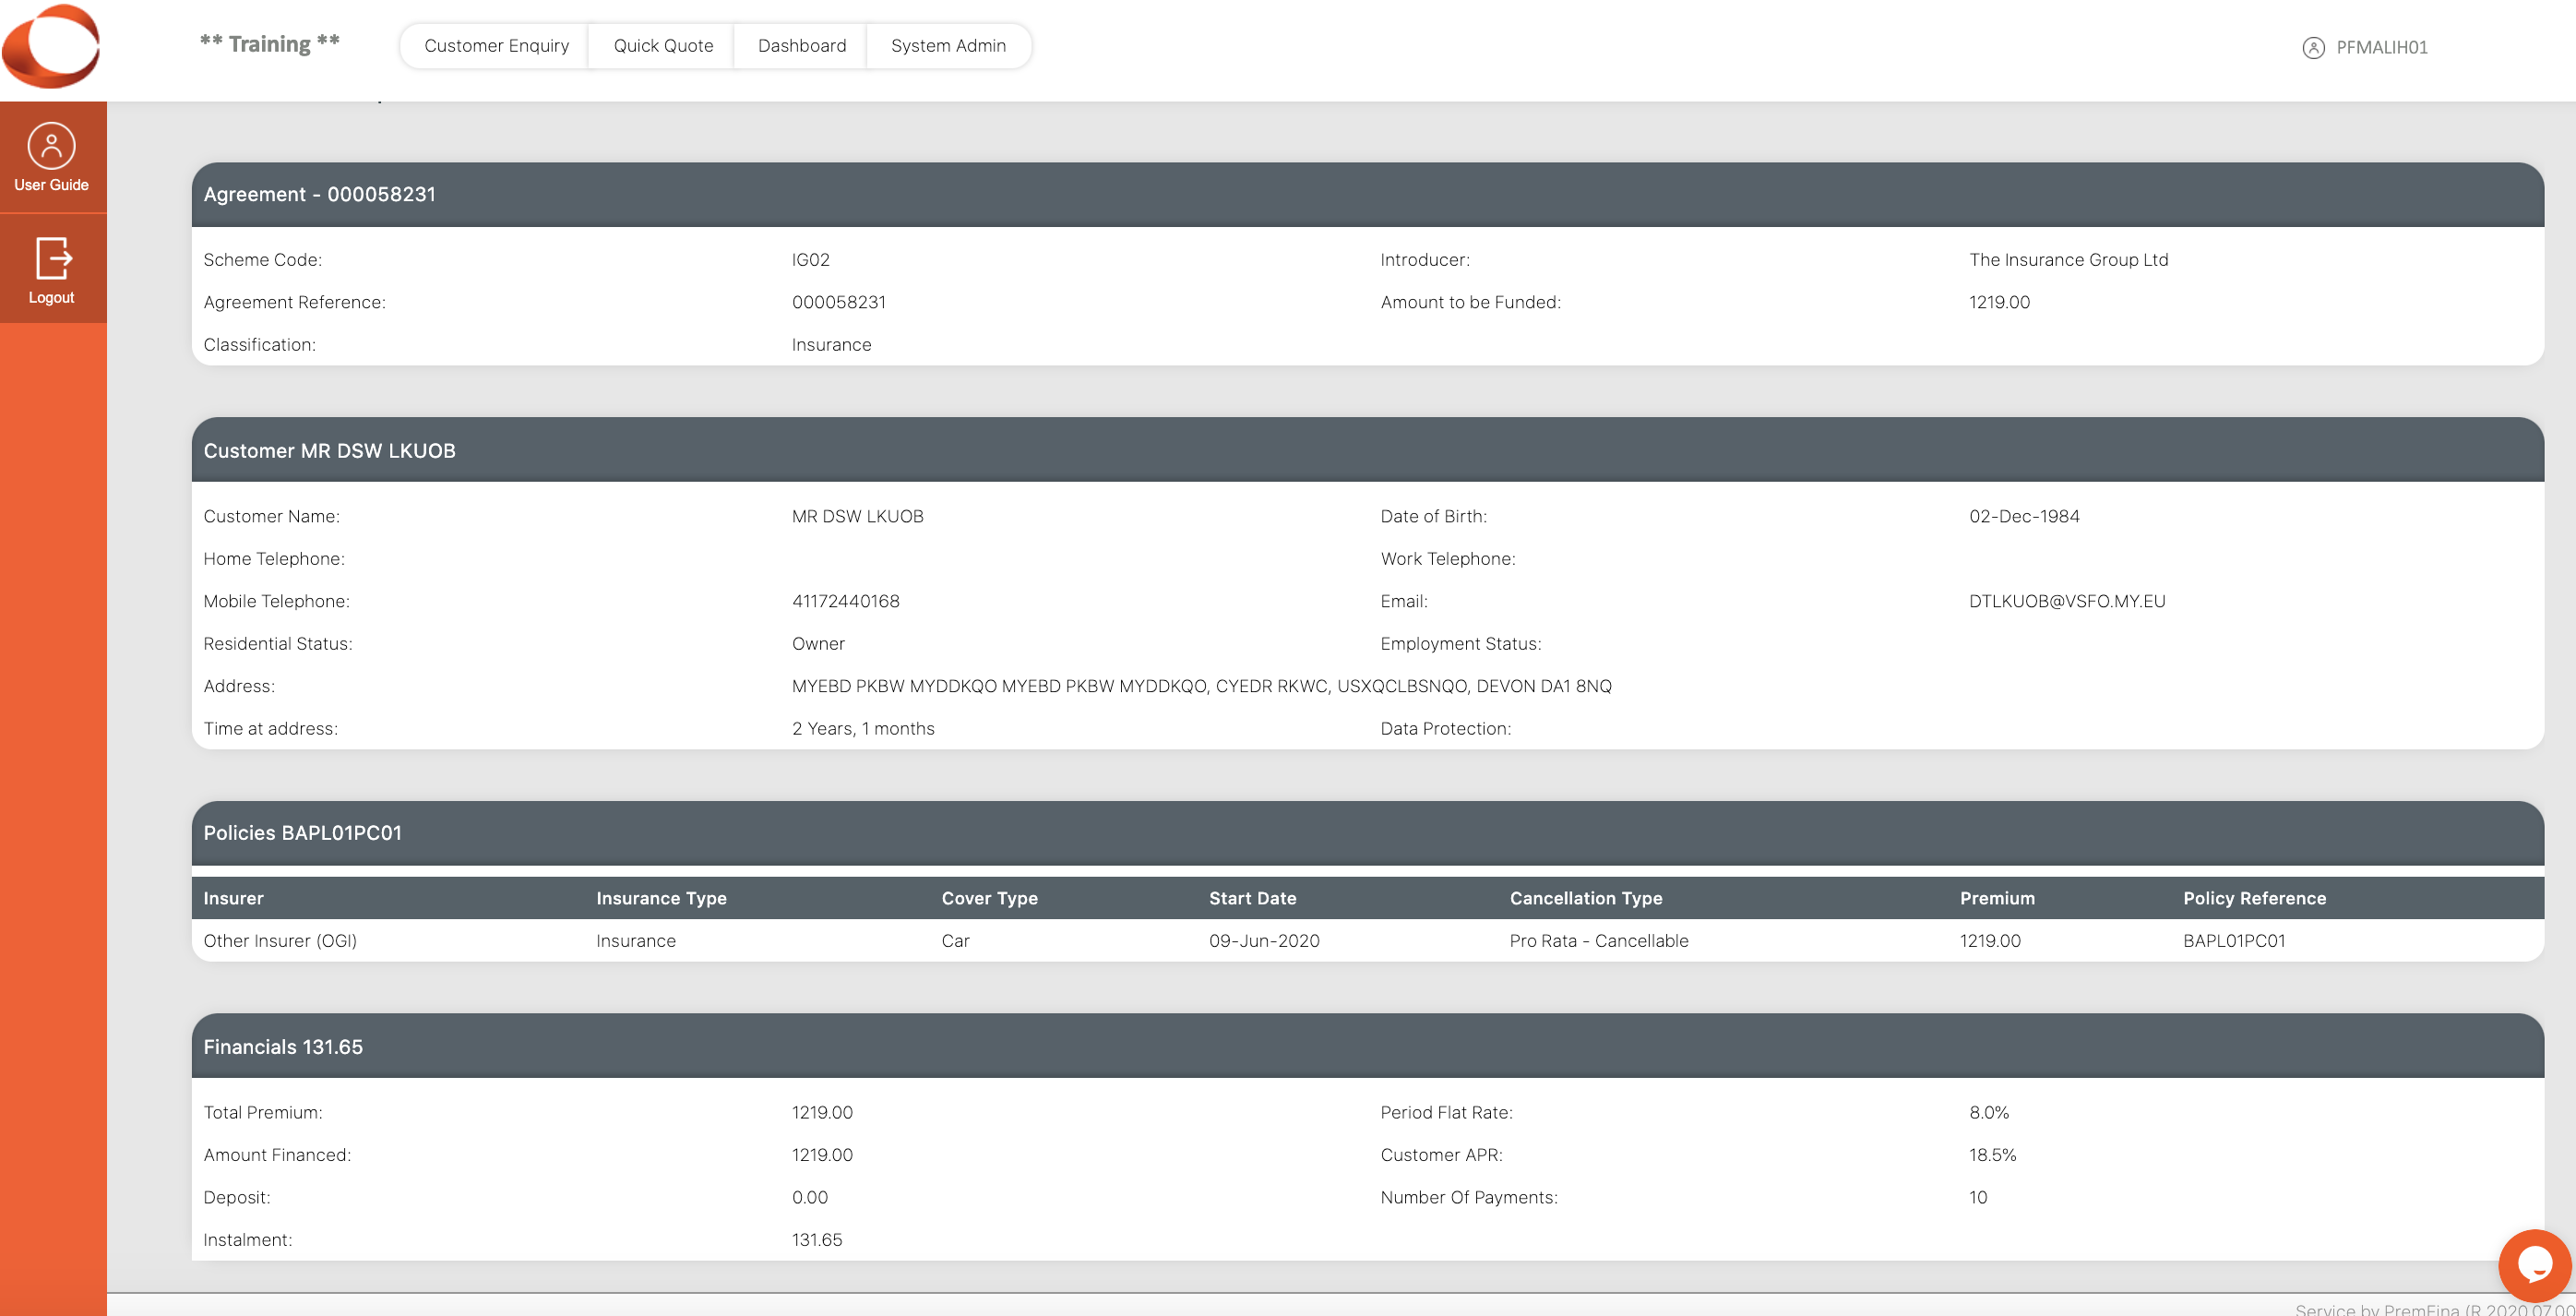
If the wrong customer has been entered and needs to be changed, clicking on the Agreement - policy number in the upper left panel, which will display the page below. Click the Replace Customer button, this opens the Customer Search page where you can search for a different customer, or create a new customer.
- Person - existing customers
All information should already be entered.
- Company - existing customers
All information should already be entered
For new customers, complete the details as normal.
¶ Decline, Events and Notes
Once a new business agreement has been created, i.e. an agreement number has been allocated, every page in the new business flow includes the following two buttons:
Decline:
- Click this button if, at any point before Activation, the proposal should be declined. On clicking Decline, the Decline Proposal page is displayed. Click Close to decline the policy. If you do not wish to decline, click Take Up to reverse the decline, this will take you to the Policy page.
Events and Notes: - We use this function to add something that is relevant to either the customer or the policy. Click this button if, at any point before Activation, notes should be added to the agreement. On clicking Events and Notes the Agreement Events and Notes page is displayed.
From here, click Add Note, type free format text into the Note Text panel, then click Save Note to log notes against the agreement.
¶ Policy Details
Please note: As you progress through the stages, previous pages can be accessed by clicking on the relevant bar. Such as Agreement number or Customer.
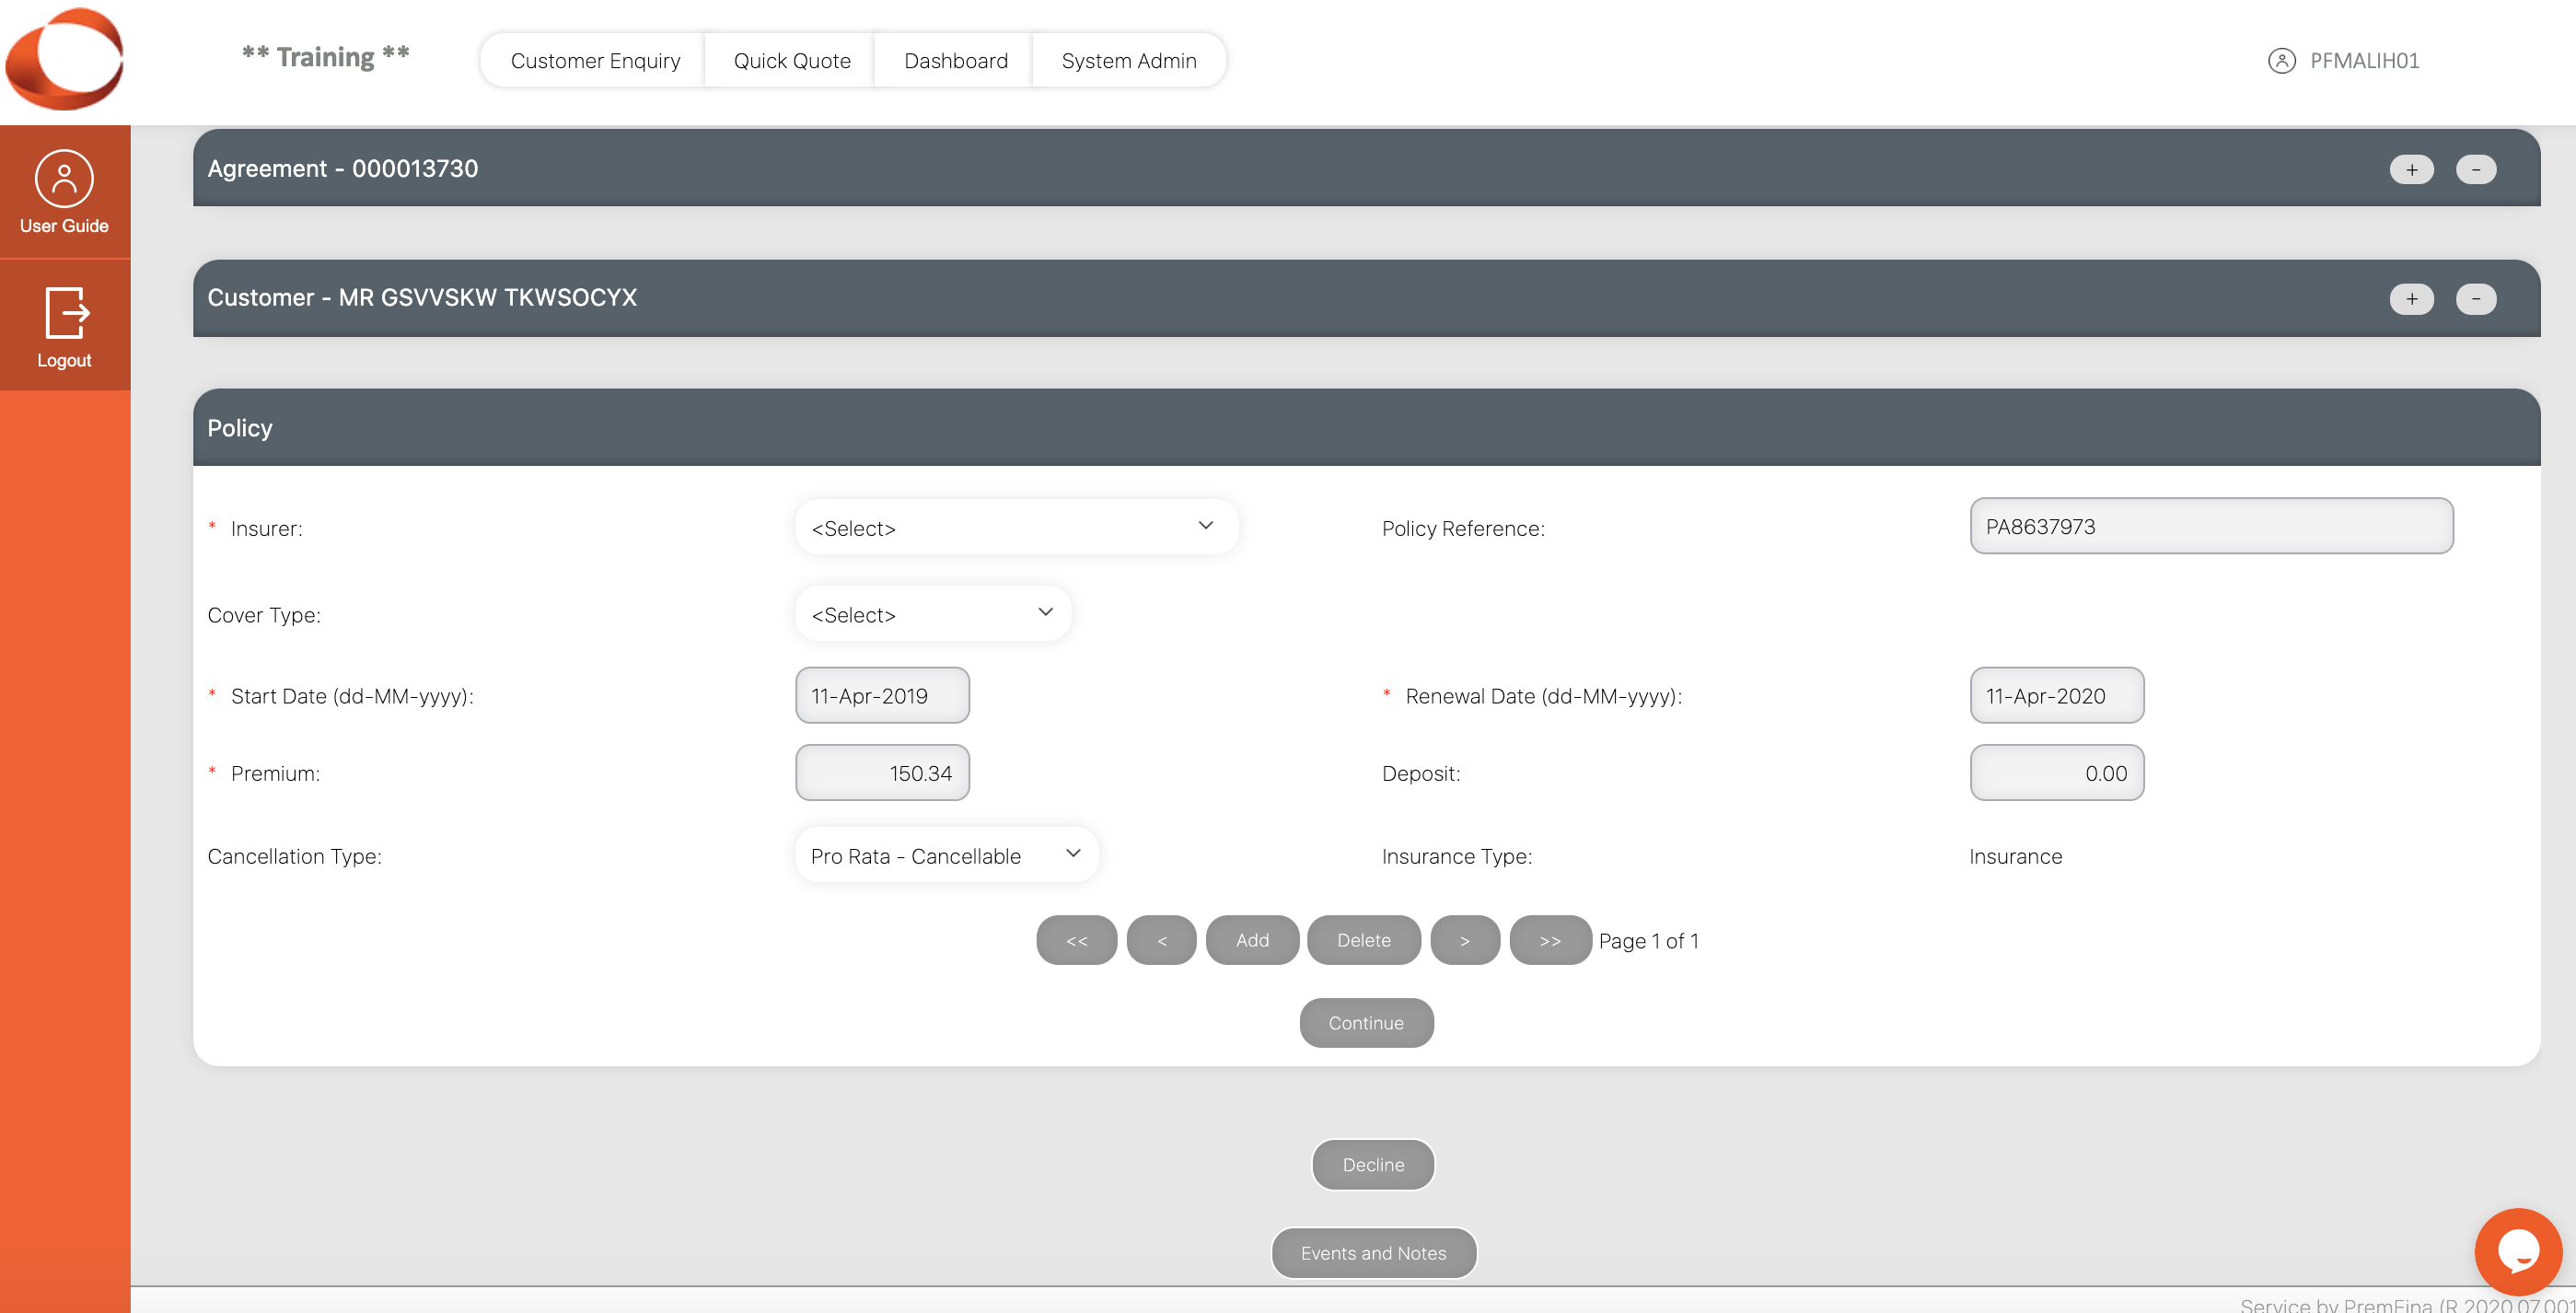
The following fields must be completed:
Insurer – This default in but can be selected from a list of possible insurers, (If the you can’t find the chosen insurer get in touch with your dedicated AM to assist you.
Cover Type - A various list of cover type - Also reflecting on Power BI
Policy Reference – This is where the policy reference must be entered, to a maximum of 40 characters. Although it is preferable to input the policy reference at the earliest stage possible, you may wish to proceed with the finance application and add it later in the new business process. ‘NOT SUPPLIED’ will default in if this field is not completed.
Start Date – The insurance commencement date is mandatory.
Renewal Date – The renewal date is automatically populated when the start date is input.
Premium – This default in but can be overtyped in exceptional circumstances and dependant on your User Level.
Cancellation Type – Select the insurance policy cancellation type from the drop down list.
Multiple policies on the same agreement are catered for and can be input using the Add button. You will need to have available the start date, deposit, premium, cancellation type and policy reference of any additional policies, as they will need to be input manually.
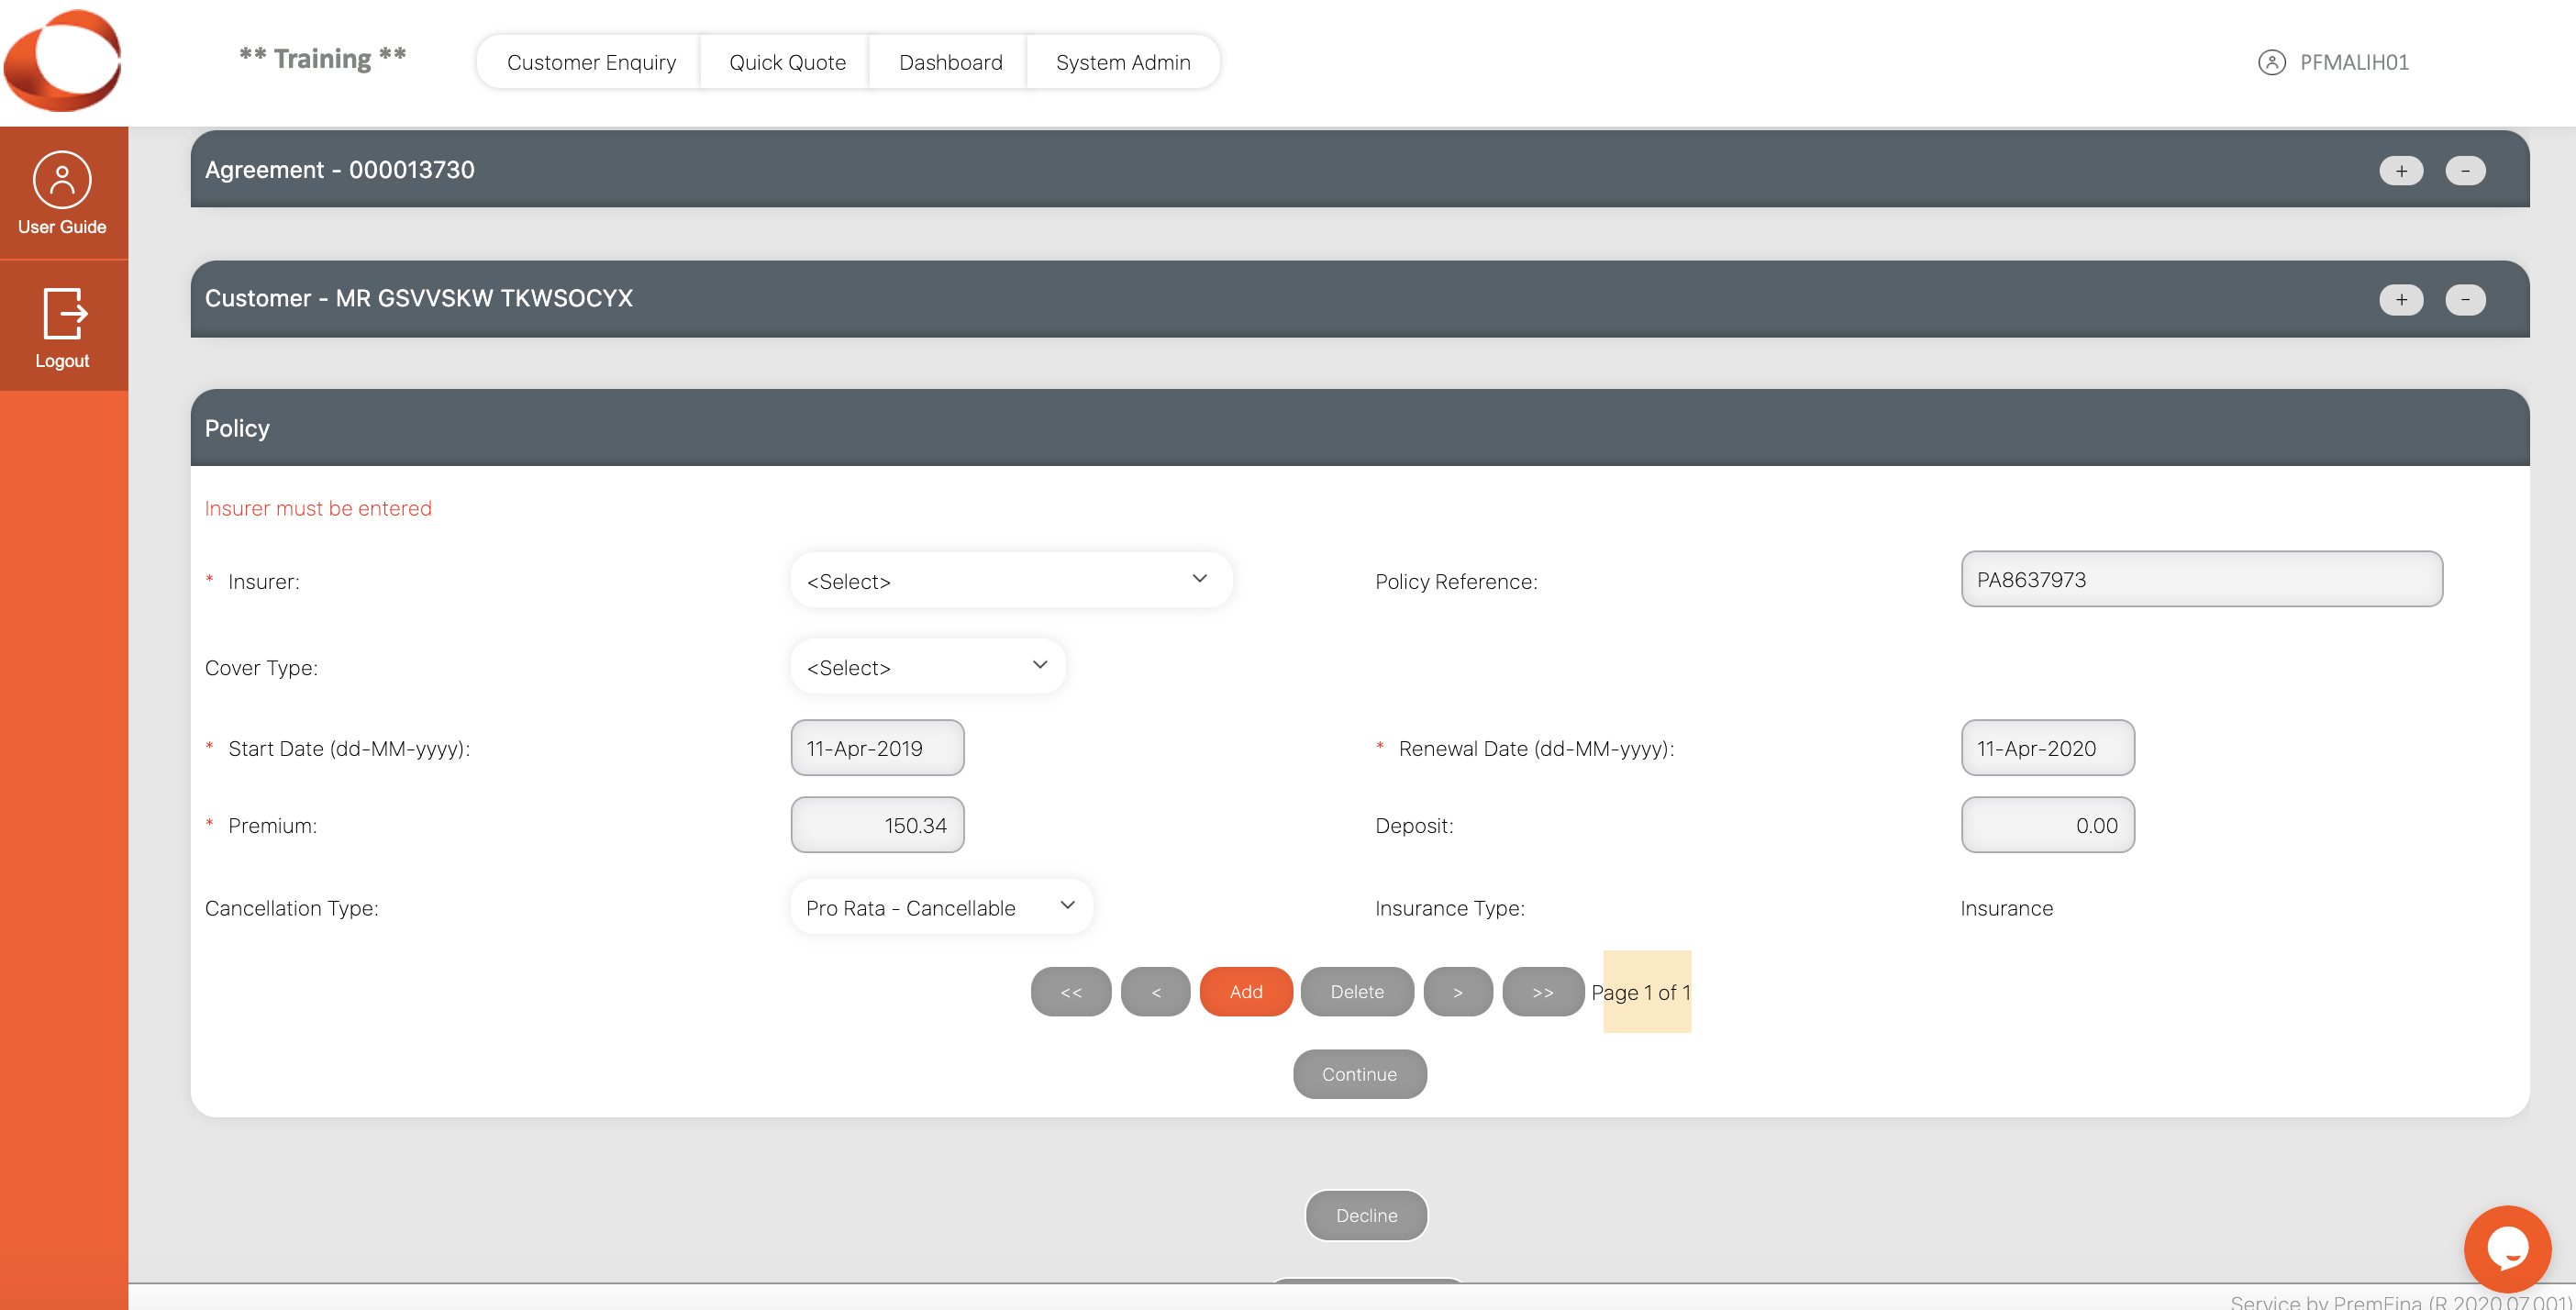
Once all policy details have been entered, click Continue.
¶ Finance & Funding
The financial and funding details of the agreement are displayed at this point.
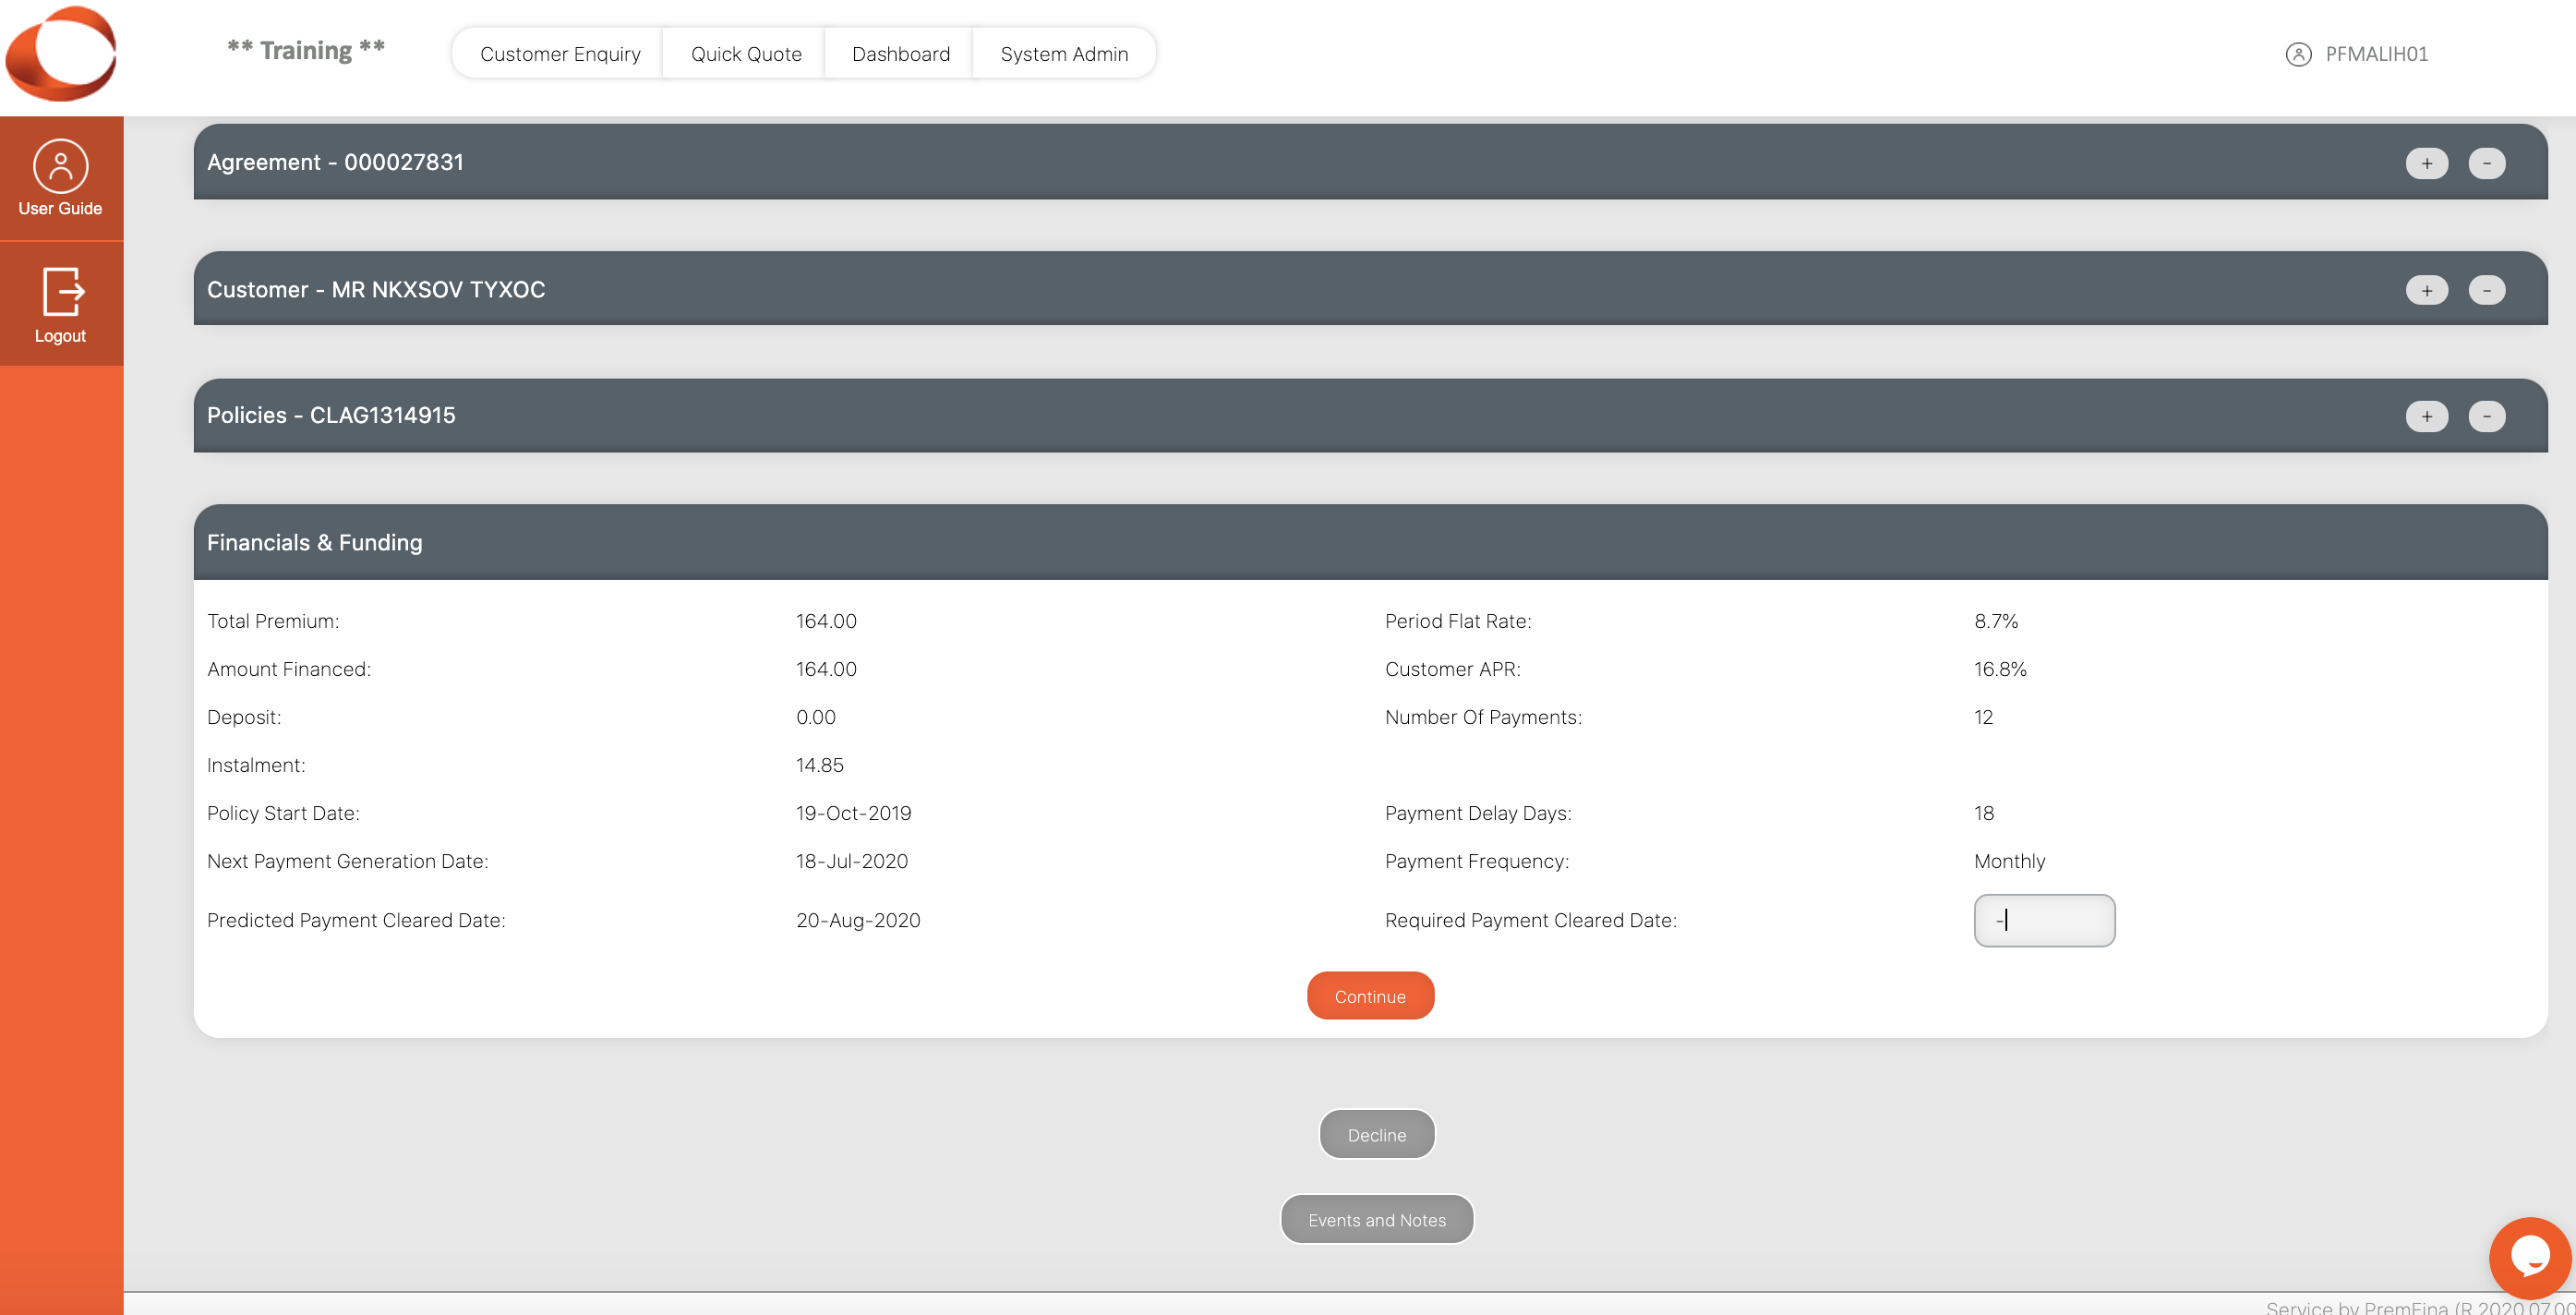
This page confirms that the premium, rates, deposit, number of payments, instalment amount and policy start date, are all those the customer has agreed to. The Required Payment Cleared Date is not completed at this point. Click continue if agreed.
¶ Bank Details
All regular instalments paid to the agreement, will be made by direct debit. It is therefore necessary to input details of the bank account that payments will be collected from.
If the customer has a preference for the day the direct debit should be collected, this can be specified on this page. For the majority of schemes, the preferred due date does not come into play until the second instalment as the first payment will be taken within 14 days after creation of the agreement.
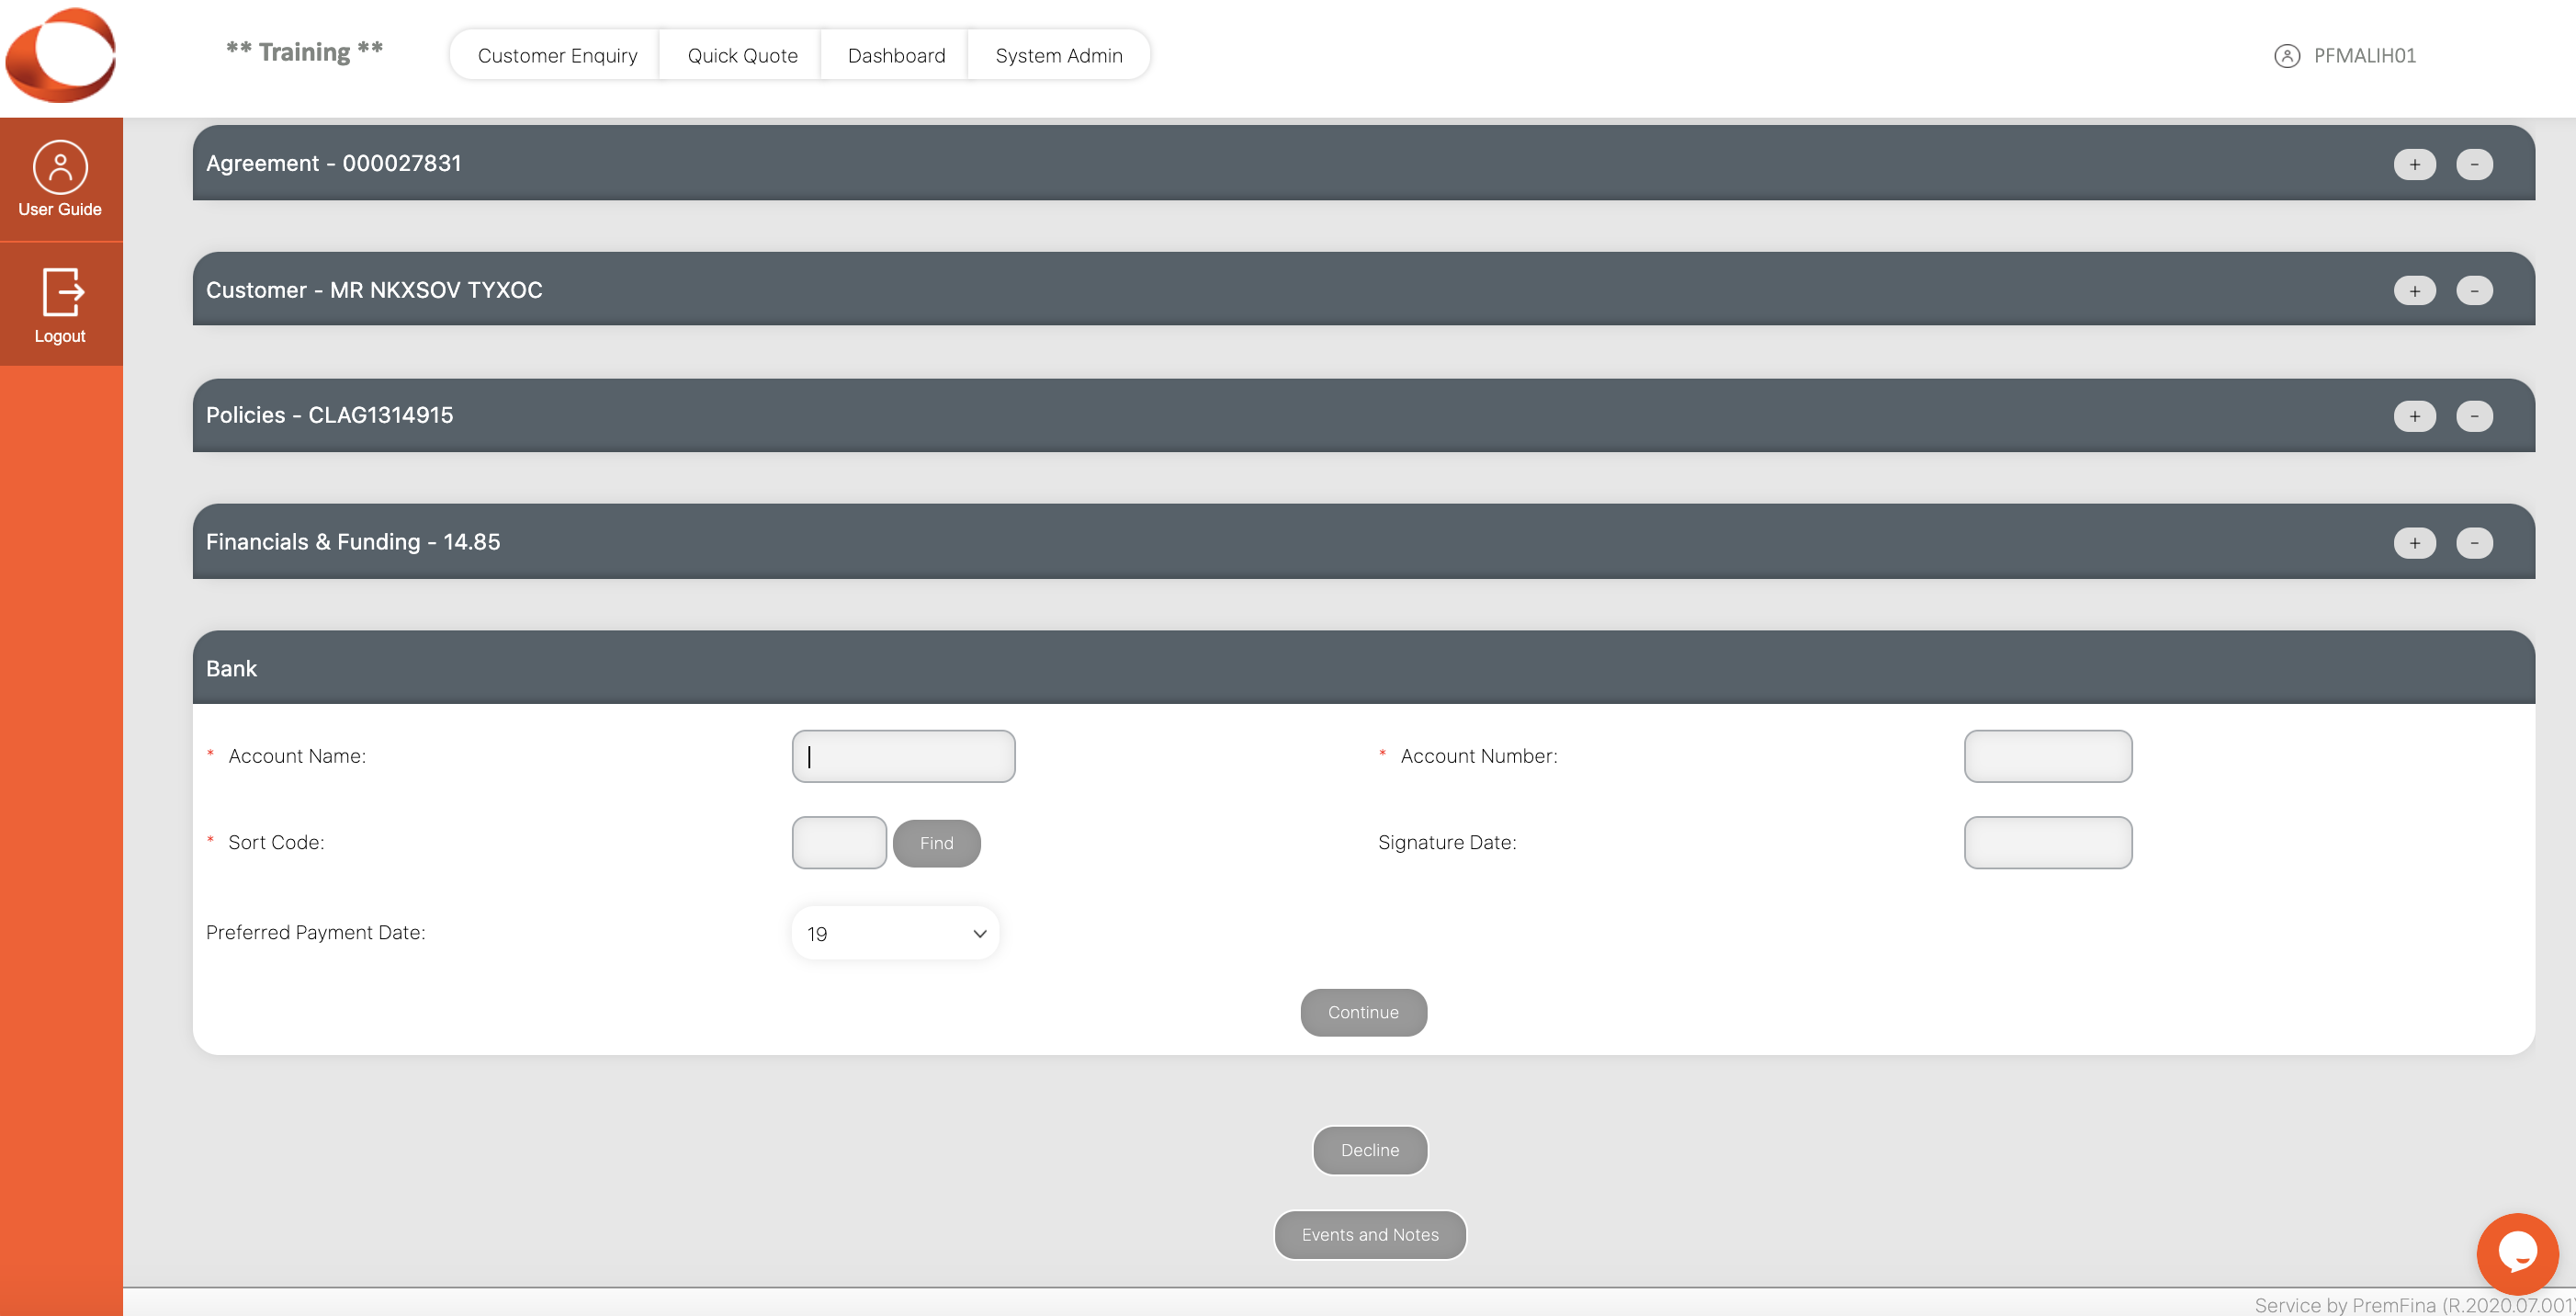
The bank details supplied are validated against a software package called ‘Bank Wizard’. This checks that the sort code exists, that the account number supplied is valid for that sort code, and that the account is of a type that supports payment by direct debit. The Signature Date box does not need to be completed, as the details will be confirmed in the Welcome Letter to the client.
Click continue to verify the bank account details, if valid the next page shows the account details on the Bank section, if not you will see the page below. If correct, click continue to proceed to the activation page, if incorrect click back and re-input.

¶ Activation
If the agreement passes credit scoring, the agreement will be ready to Activate, click Activate.
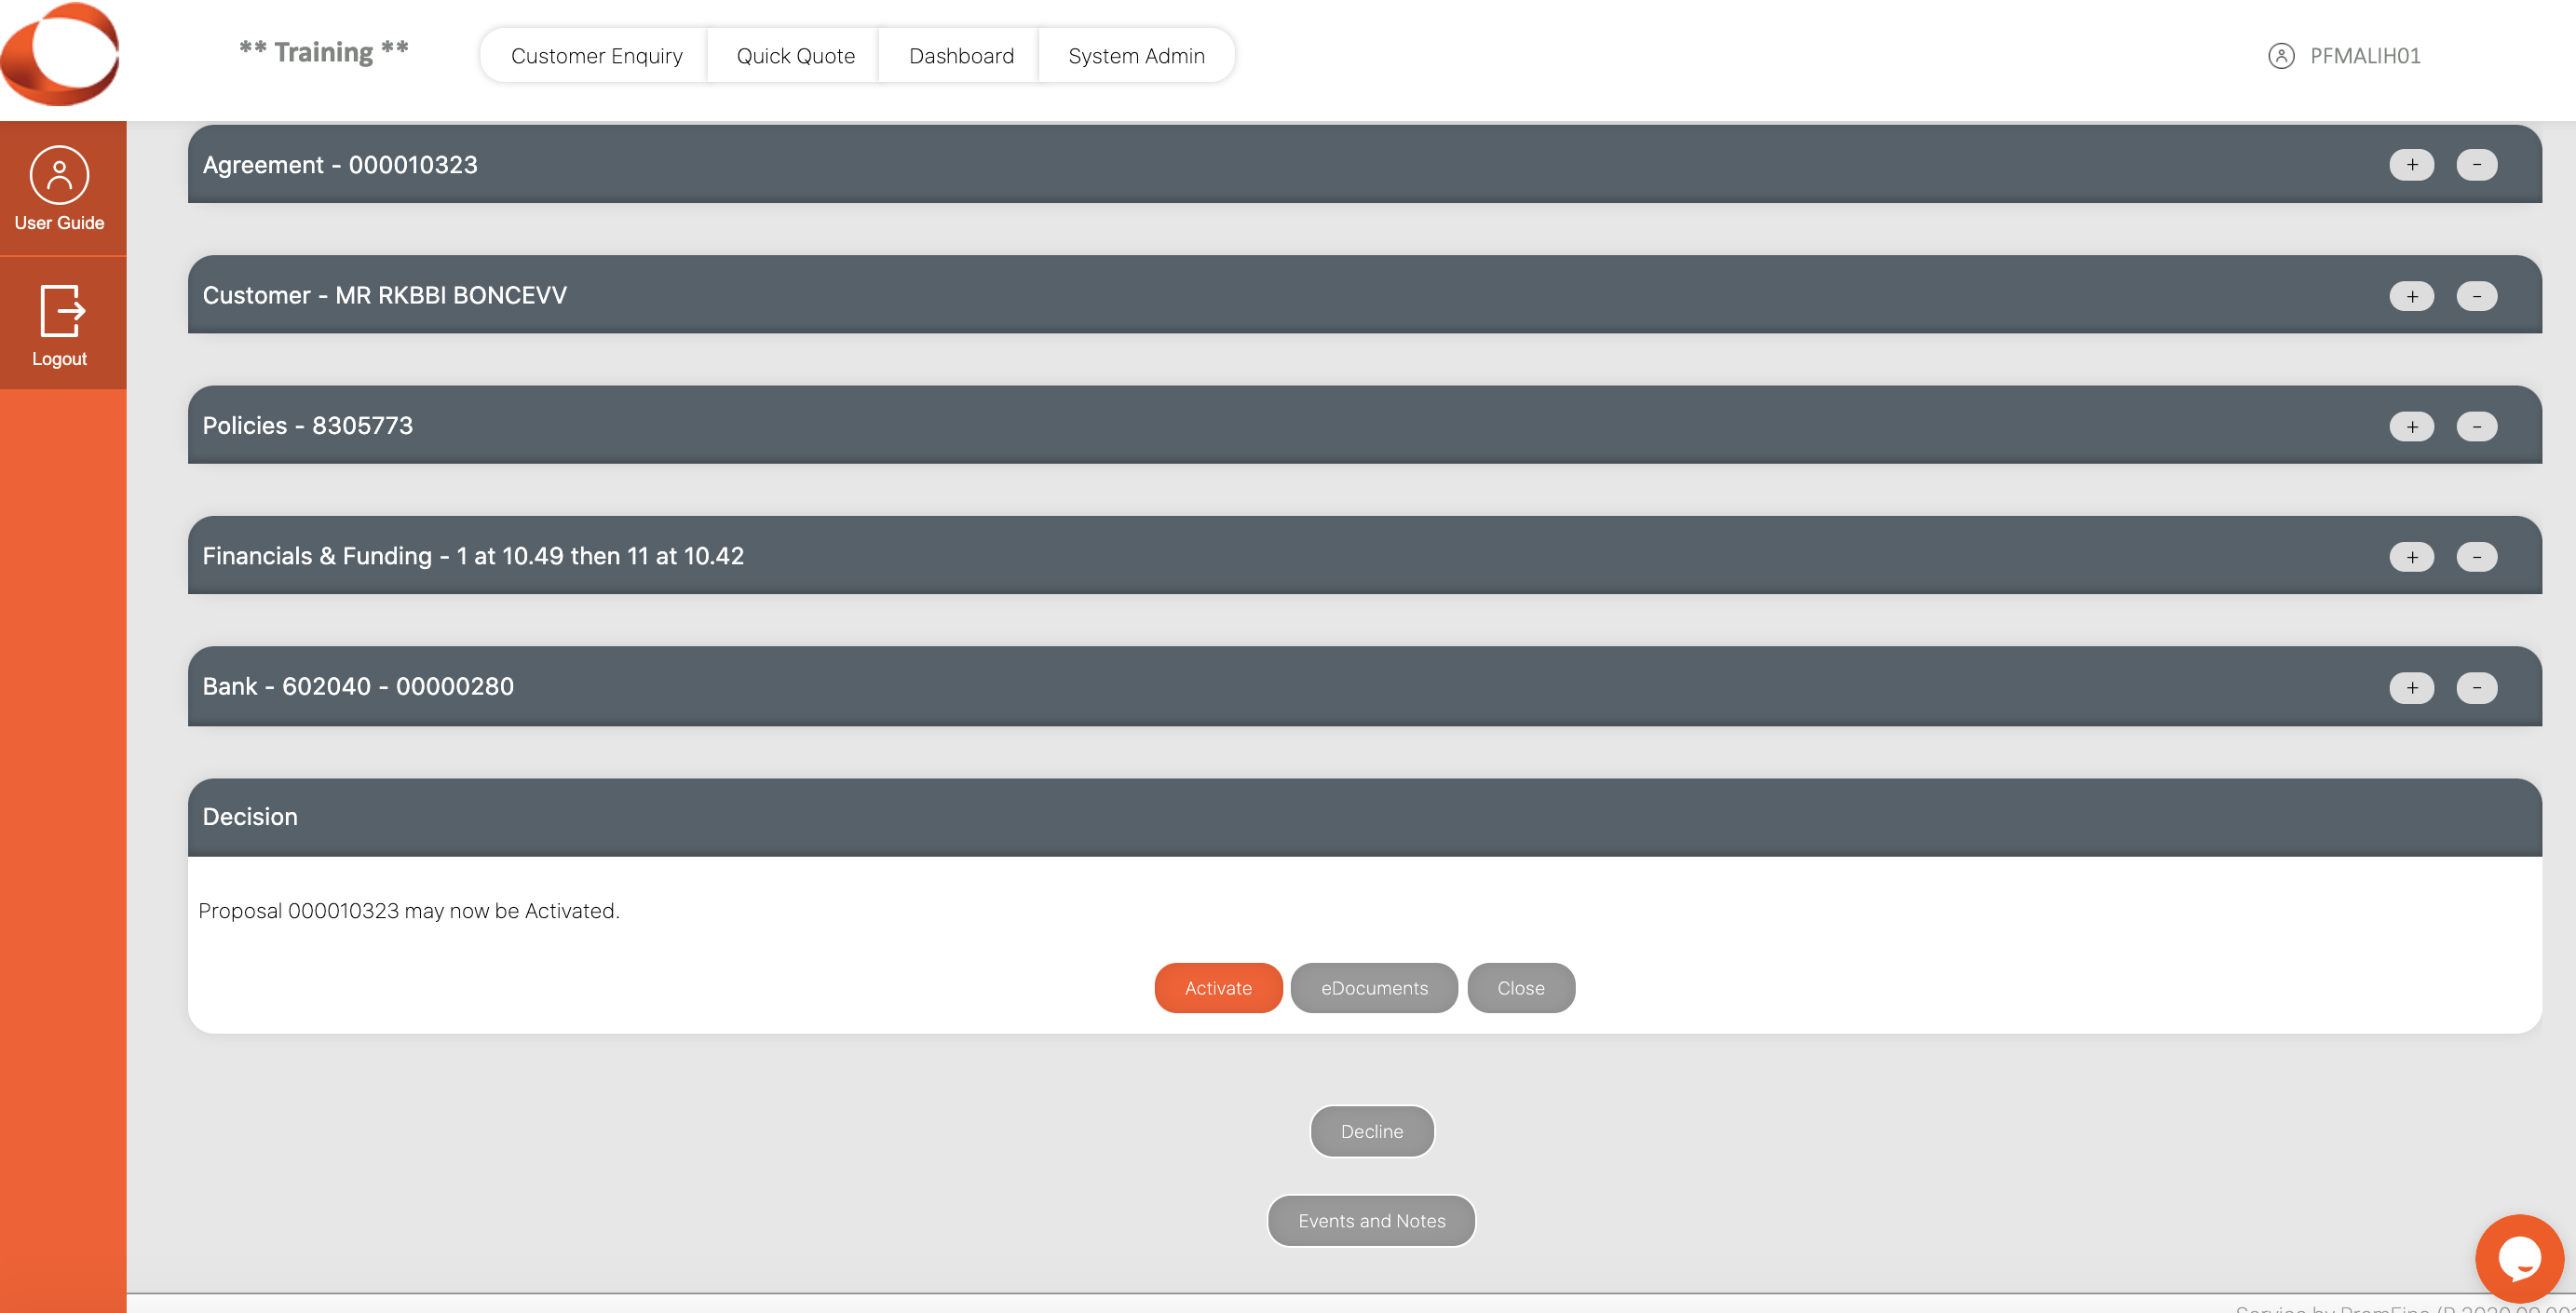
Where the system is configured to ‘View Documents on Activation’, a Requested Documents panel is displayed after activation, showing the documents generated as part of activation.
The activation process triggers the production of the Credit Agreement, Welcome Letter, Policy Schedule, where there are multiple insurance policies, and where appropriate, the Notice of Cancellation Rights.
These documents can then either be emailed or printed off and sent to the customer (if printing remember to print 2 copies of the Credit Agreement, one for customer retention and the other for signature and return).
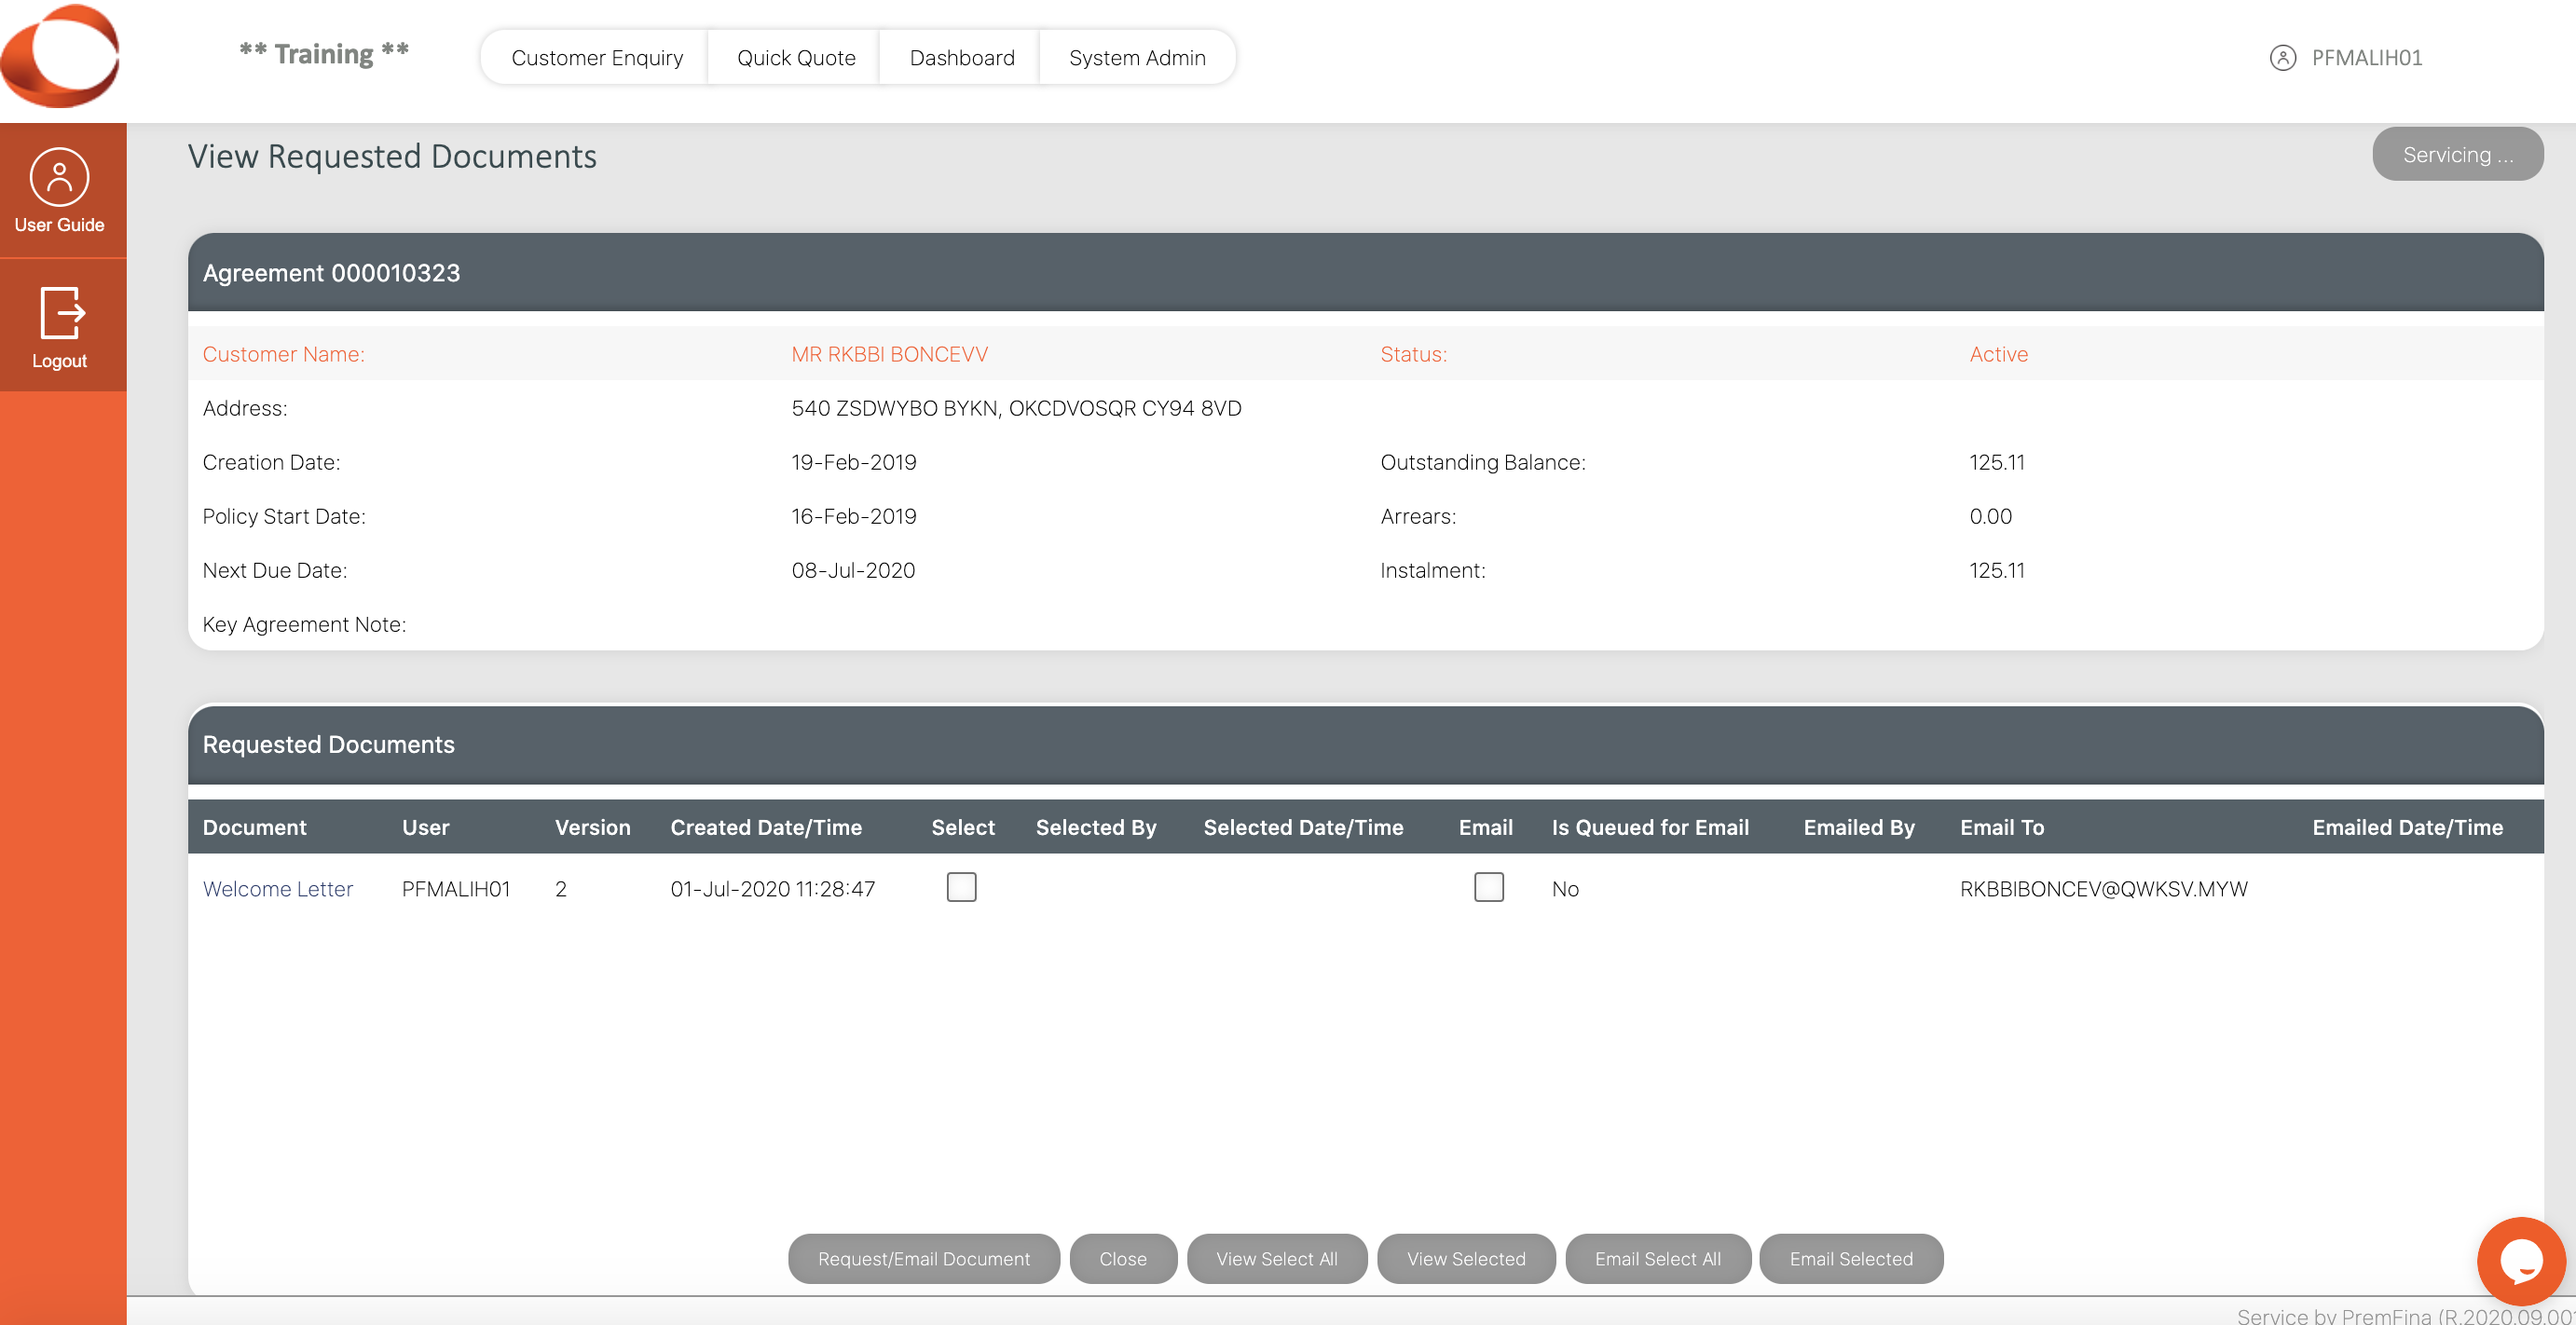
The easiest way to email or print documents is to click the relevant Select All button. This will open all the documents generated on activation in a PDF viewer window. From there you can email or print the documents and, if required, save them to a specified directory.
To view individually, click a document name, or tick the Select checkbox and click the View Selected button and it will open in your PDF viewer.
If more than one policy is shown, you can select the relevant documents by checking the relevant Select boxes and click view selected.
You can now click close and return to the home page.